Quick Start On Premise
This setup is not suitable for a production deployment.
To evaluate WAP, you can install the WAP Application and WAP Application Database on a single host. This setup provides all the functionality of WAP monitoring and automation but provides no failover or high availability.
Considerations
This test installation includes the following caveats:
-
It uses one mongod for the WAP Application database. In production, the database requires a dedicated replica set.
-
It uses MongoDB Community Edition. MongoDB Community doesn't need additional libraries.
Procedure
Deploy WAP
To install and configure an evaluation version of WAP on hosts running CentOS Linux release 7.9.2009:
1. Provision an WAP.
Provision a host for WAP. This host must meet the following requirements:
| Parameters | Value |
|---|---|
| System Memory | 16GB |
| Disk Capacity | 500GB |
| Host OS Permissions | root |
| Host OS | CentOS Linux release 7.9.2009 |
Cloud-based instances must meet the memory and storage requirements.
To verify the needed capacity, log in to the instance and execute the following commands:
vmstat -S M -s | grep "total memory"
The output for the command shows that this instance has 16 GB of RAM.
16384 M total memory
df -h | grep "/$"
The output for the command shows that this instance has 557 GB of storage capacity.
/dev/sda 557G 1.4G 548G 1% /
Verify that the
ulimitsettings meet the minimum requirements.
2. Configure yum to install MongoDB.
Create a /etc/yum.repos.d/mongodb-org-5.0.repo file so that you can install MongoDB directly using yum:
[mongodb-org-5.0]
name=MongoDB Repository
baseurl=https://repo.mongodb.org/yum/redhat/$releasever/mongodb-org/5.0/x86_64/
gpgcheck=1
enabled=1
gpgkey=https://pgp.mongodb.com/server-5.0.asc
3. Install MongoDB.
Invoke the following command to install the latest stable release of MongoDB Community:
sudo yum install -y mongodb-org
4. Optional: Disable the mongod service.
WAP connects to its application database on port 27017. If the host on which you want to install the application database has a running mongod, disable that existing database.
To disable the mongod service, invoke the following command:
sudo systemctl disable mongod
5. Create the WAP Application Database directory.
sudo mkdir /data/
6. Update the MongoDB configuration file.
The installer creates a configuration file saved at /etc/mongod.conf.
Edit the file to make the following changes:
net:
  bindIp: 0.0.0.0
  port: 27017
processManagement:
  fork: "true"
security:
  authorization: enabled
  keyFile: /data/keyfile
storage:
  dbPath: /data
  journal:
      enabled: true
  engine: wiredTiger
  wiredTiger:
    engineConfig:
      cacheSizeGB: 4
systemLog:
  destination: file
  path: /data/mongodb.log
  logAppend: true
Save the file when you have made the edits.
7. Create the MongoDB KeyFile.
openssl rand -base64 756 > /data/keyfile
chmod 400 /data/keyfile
8. Start the WAP Application Database mongod instance.
sudo mongod -f /etc/mongod.conf
9. Create User in Application Database.
mongosh

user admin
db.createUser({"user": "root", "pwd": "<password>", "roles": ["root"]})
10. Prepare WAP Package.
WAP.tar.gz
11. Start WAP service.
pkill -9 java
tar -zxvf WAP.tar.gz -C /opt/
cd /opt/WAP
Update the WAP config file /opt/WAP/start.sh:
# Configure external access IP address
bind_ip=<public IP>
# Configure the WAP application database URL. Requires authorization to use the whaleal database
appDBUrl=mongodb://root:<password>@127.0.0.1:27017/admin
Start WAP service
cd /opt/WAP
chmod +x start.sh

./start.sh
12. Open the WAP home page and Reset Password.
http://<public IP>

username: admin
password: password
Reset Password and Login.
Deploy MongoDB
Deploy MongoDB's server
-
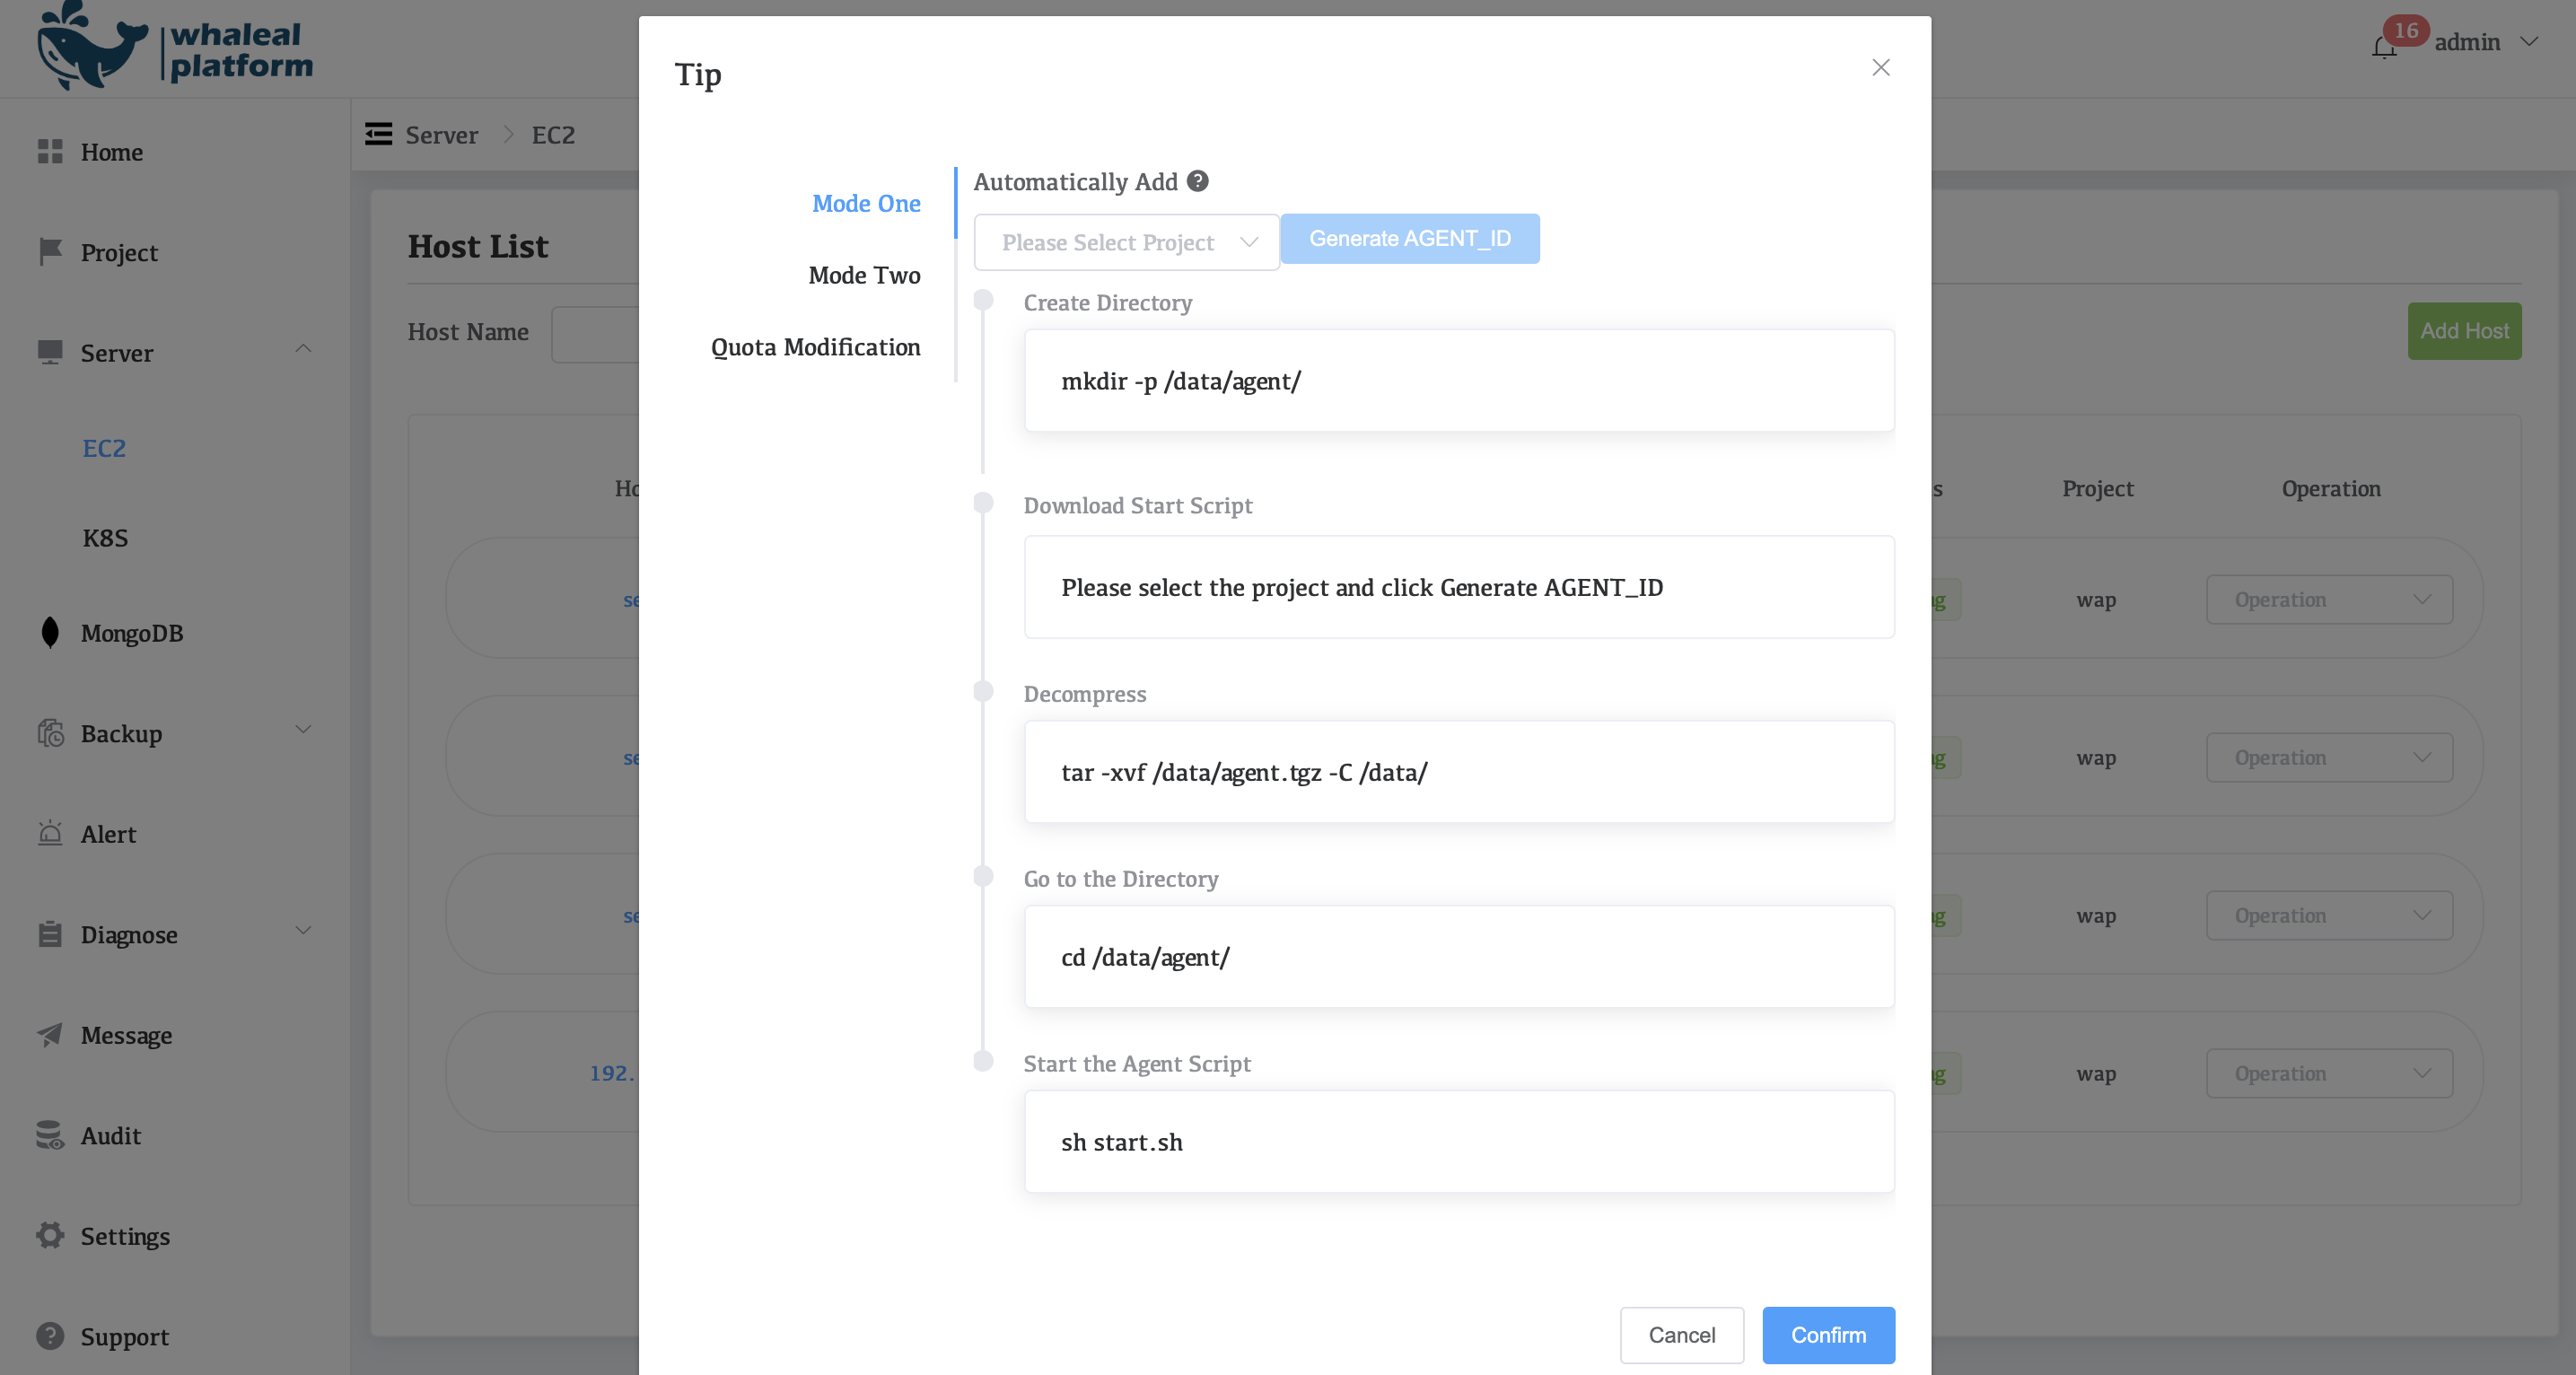
Install and deploy the agent into the server. Each machine takes turns to do the following operations

-
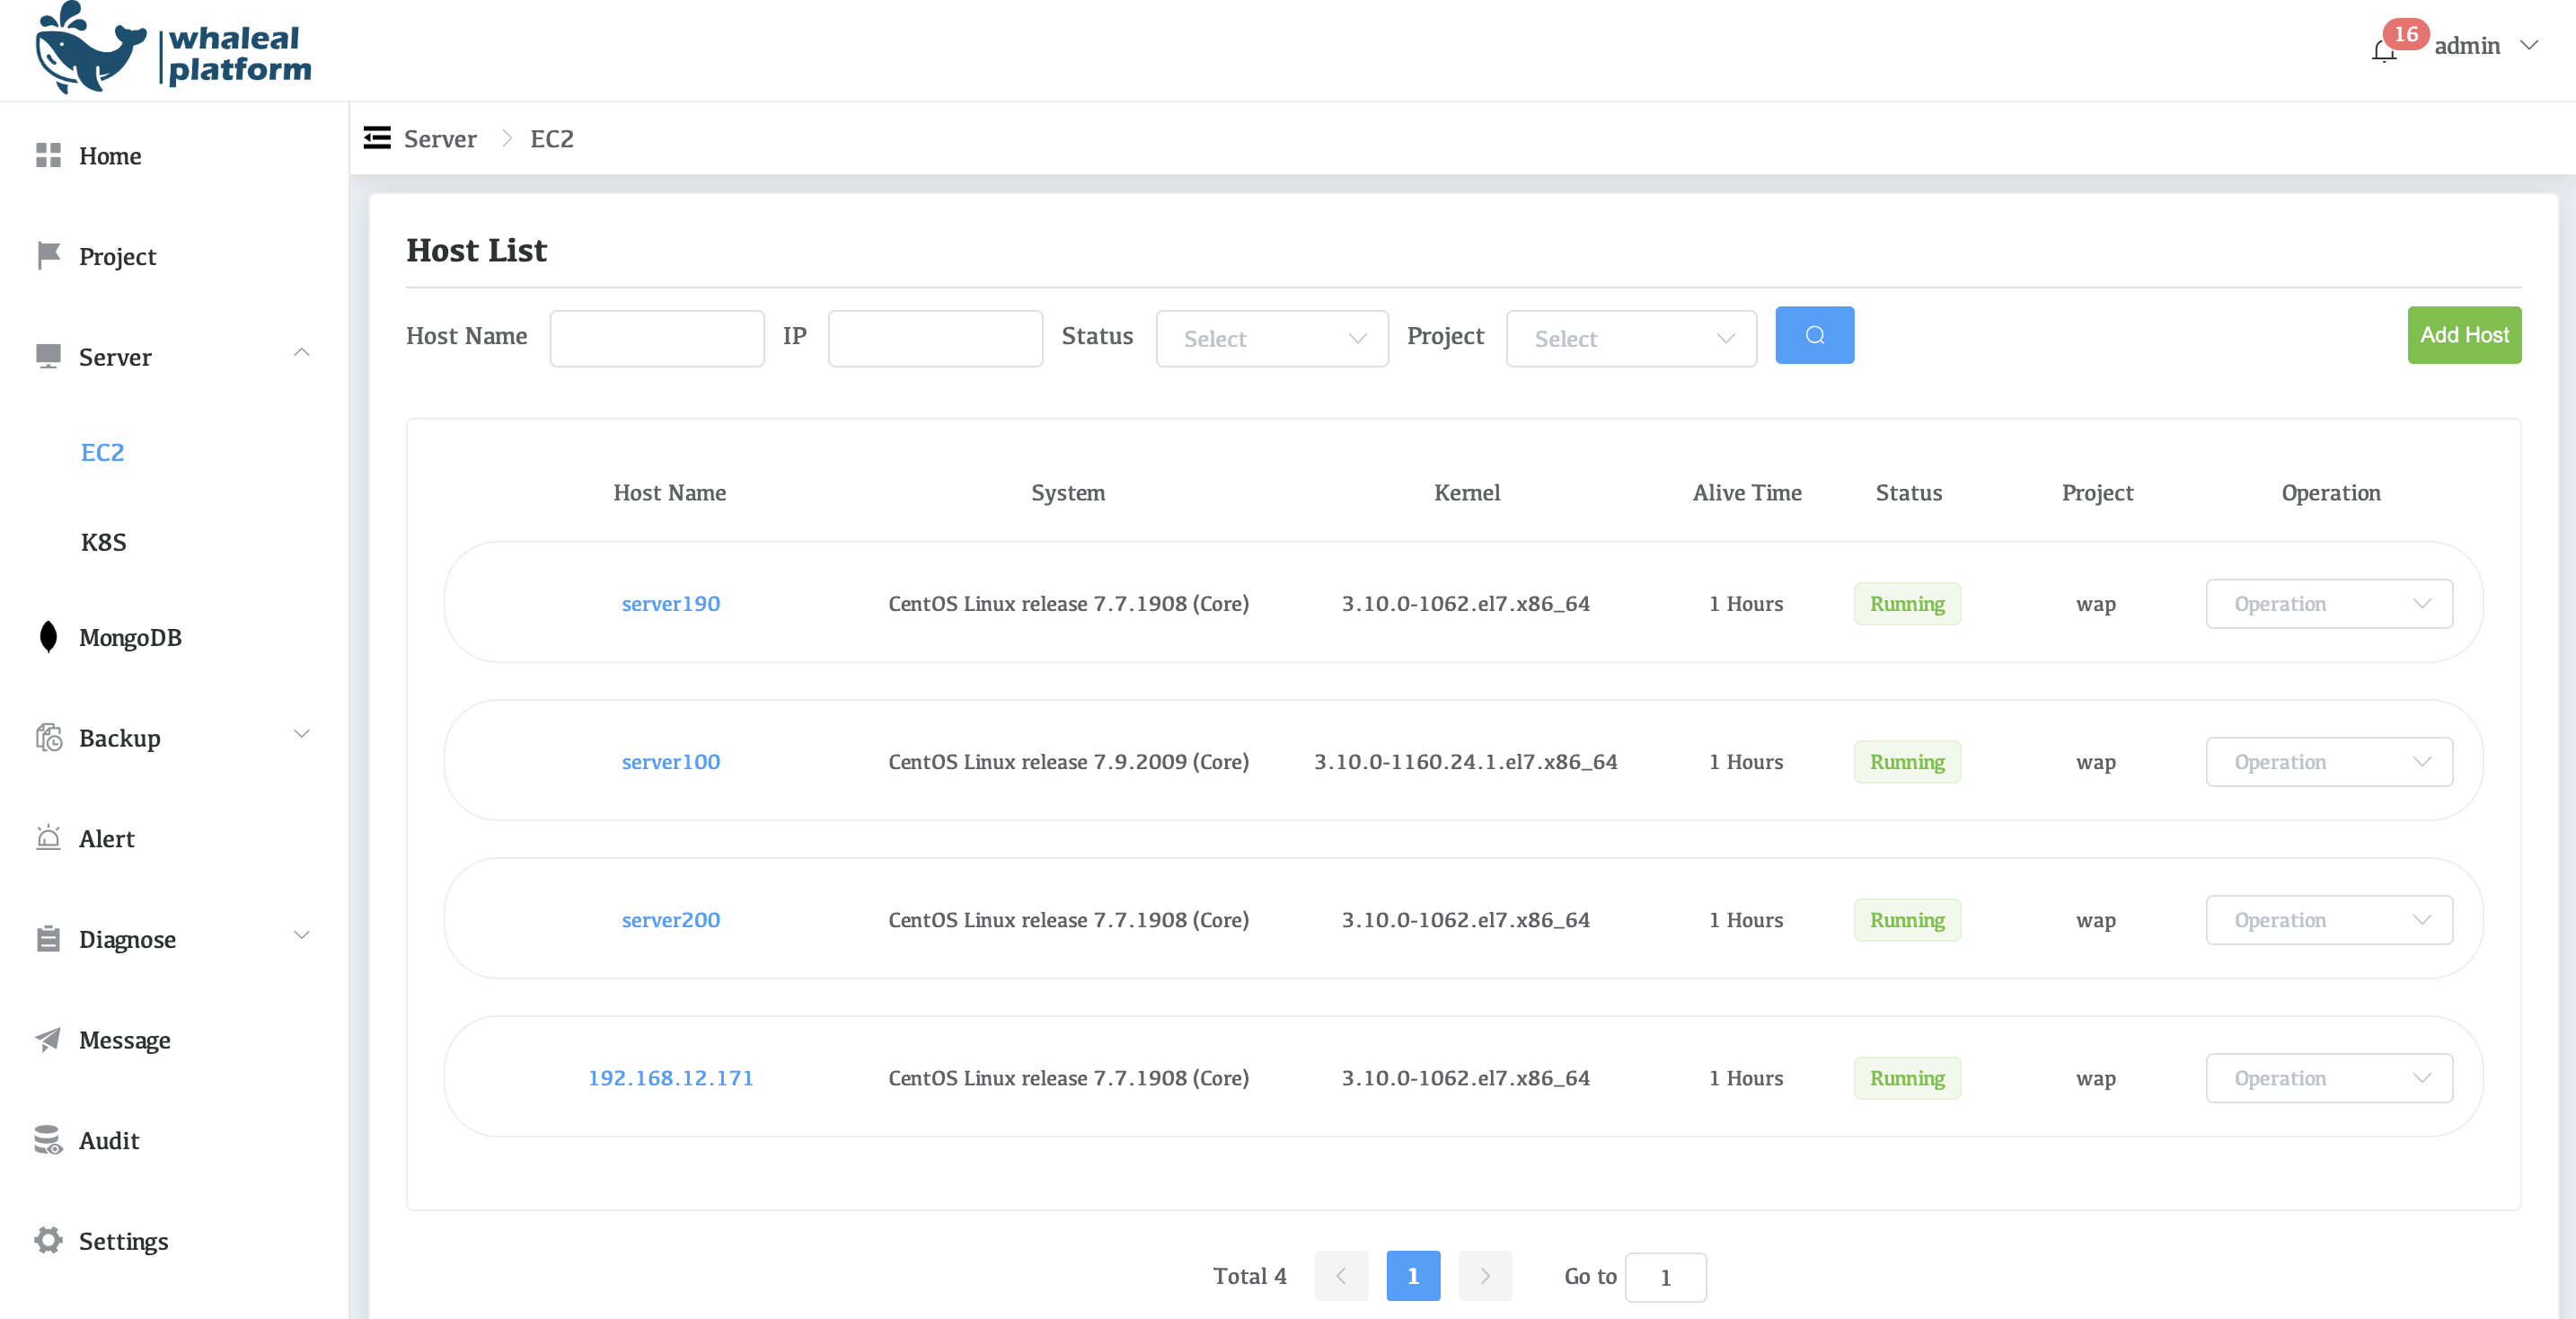
After successful management, it will be displayed in the following figure.
-
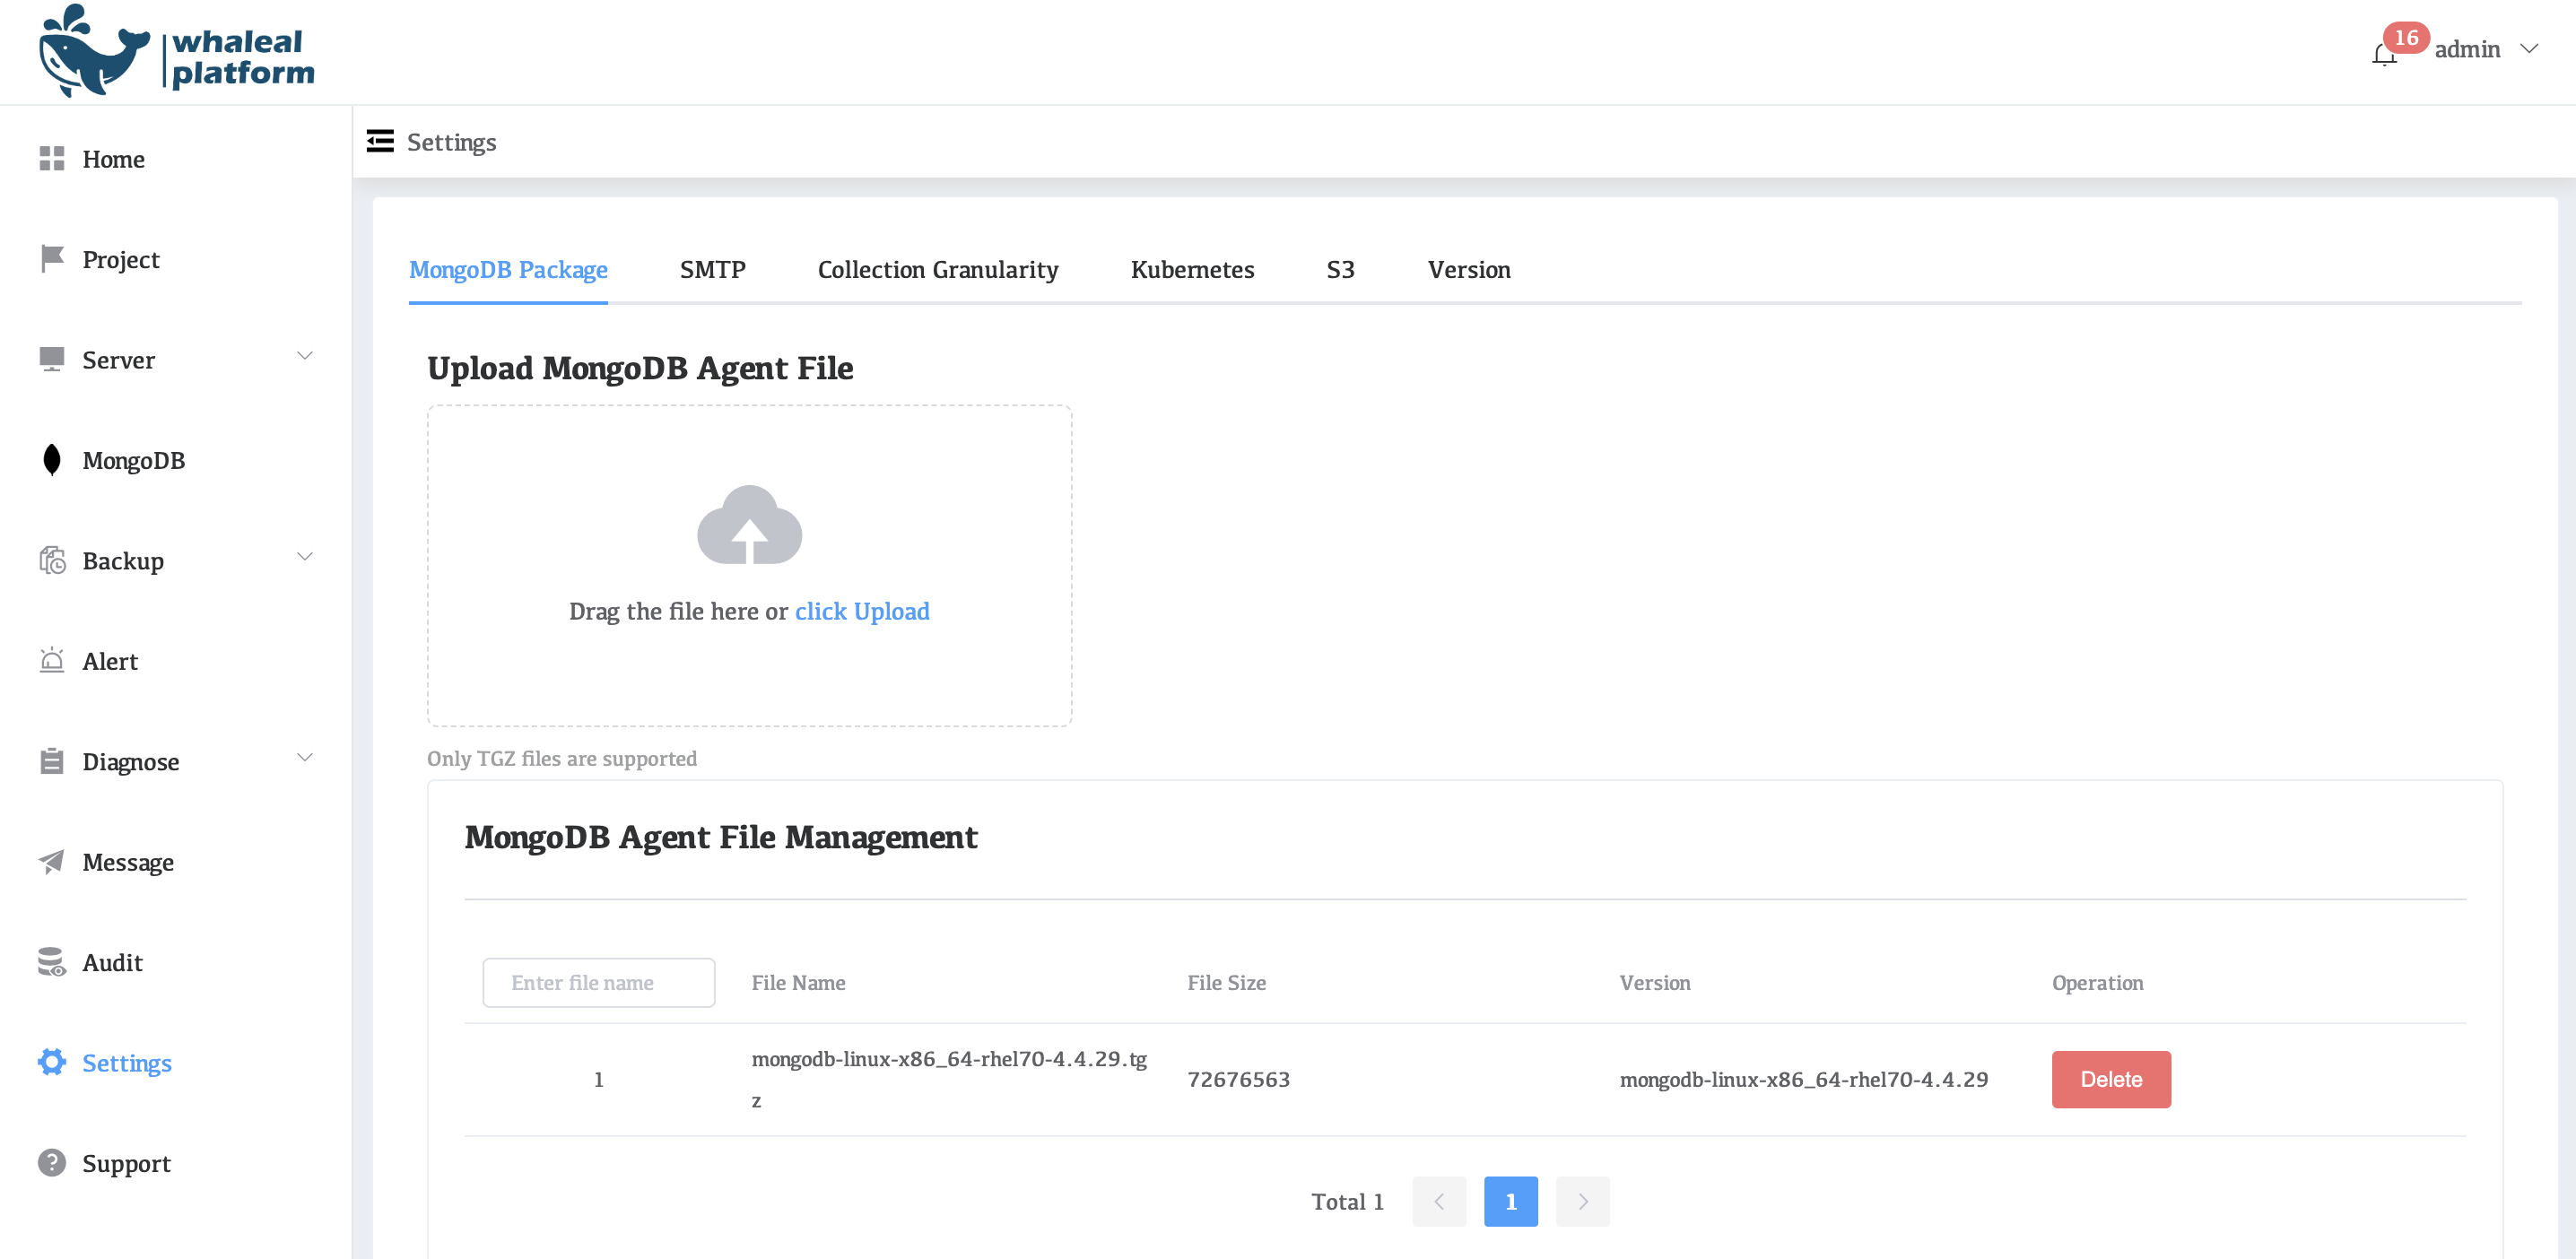
Upload MongoDB package.
Build a MongoDB three-node replication set
-
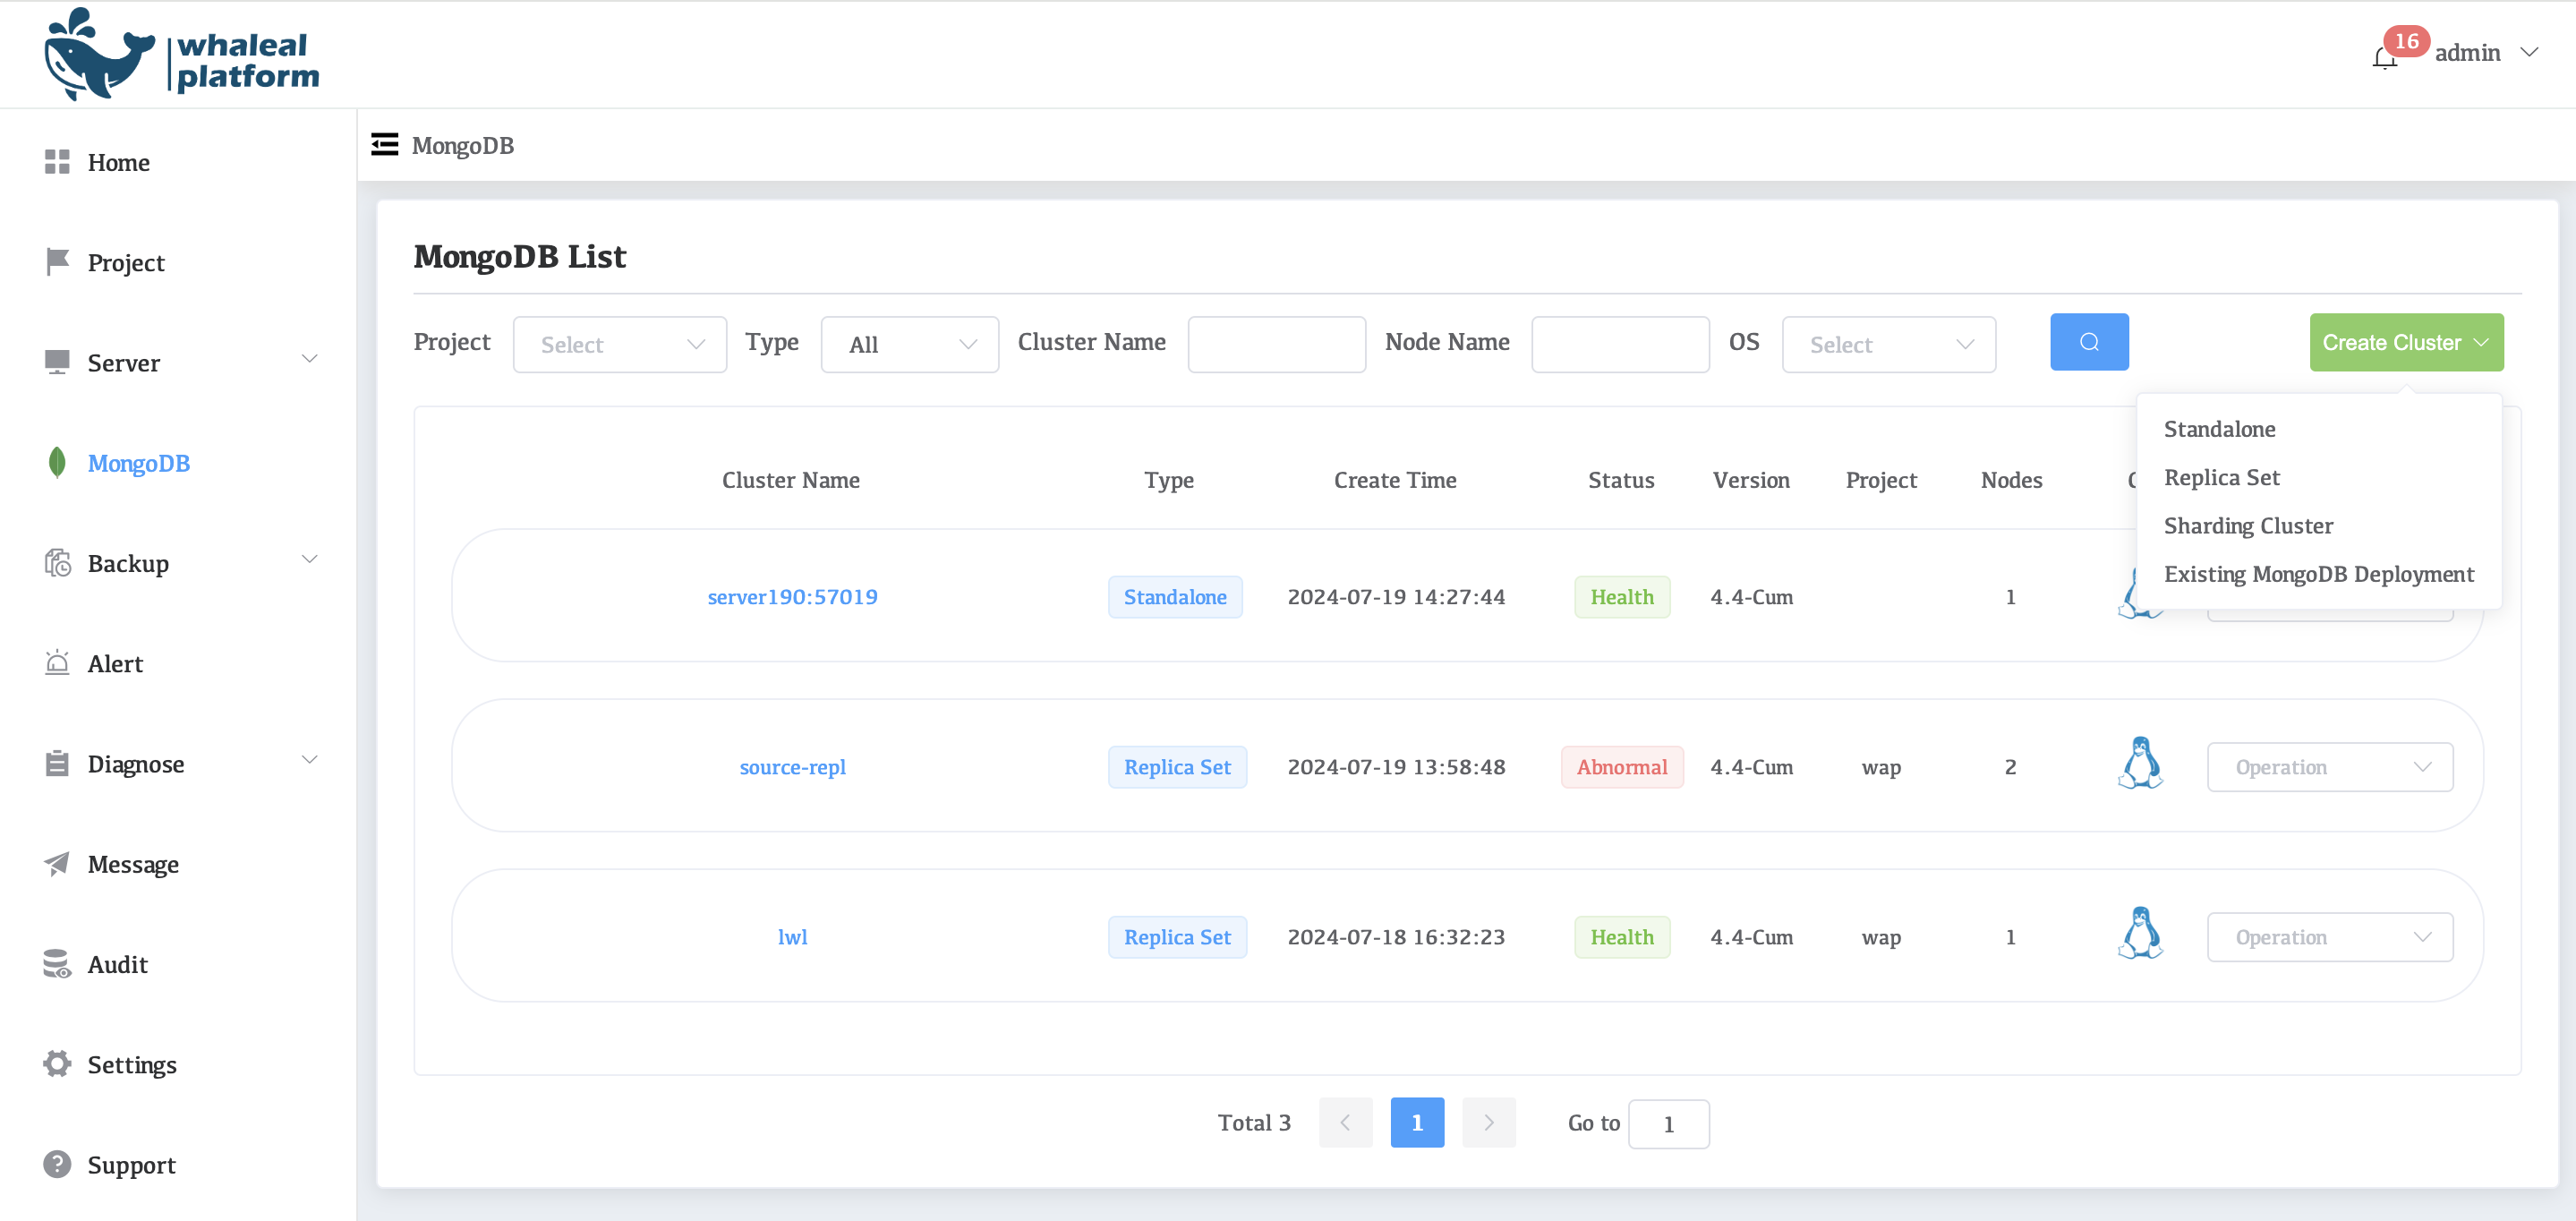
Click to the MongoDB page and click Replica Set under Create Cluster.
-
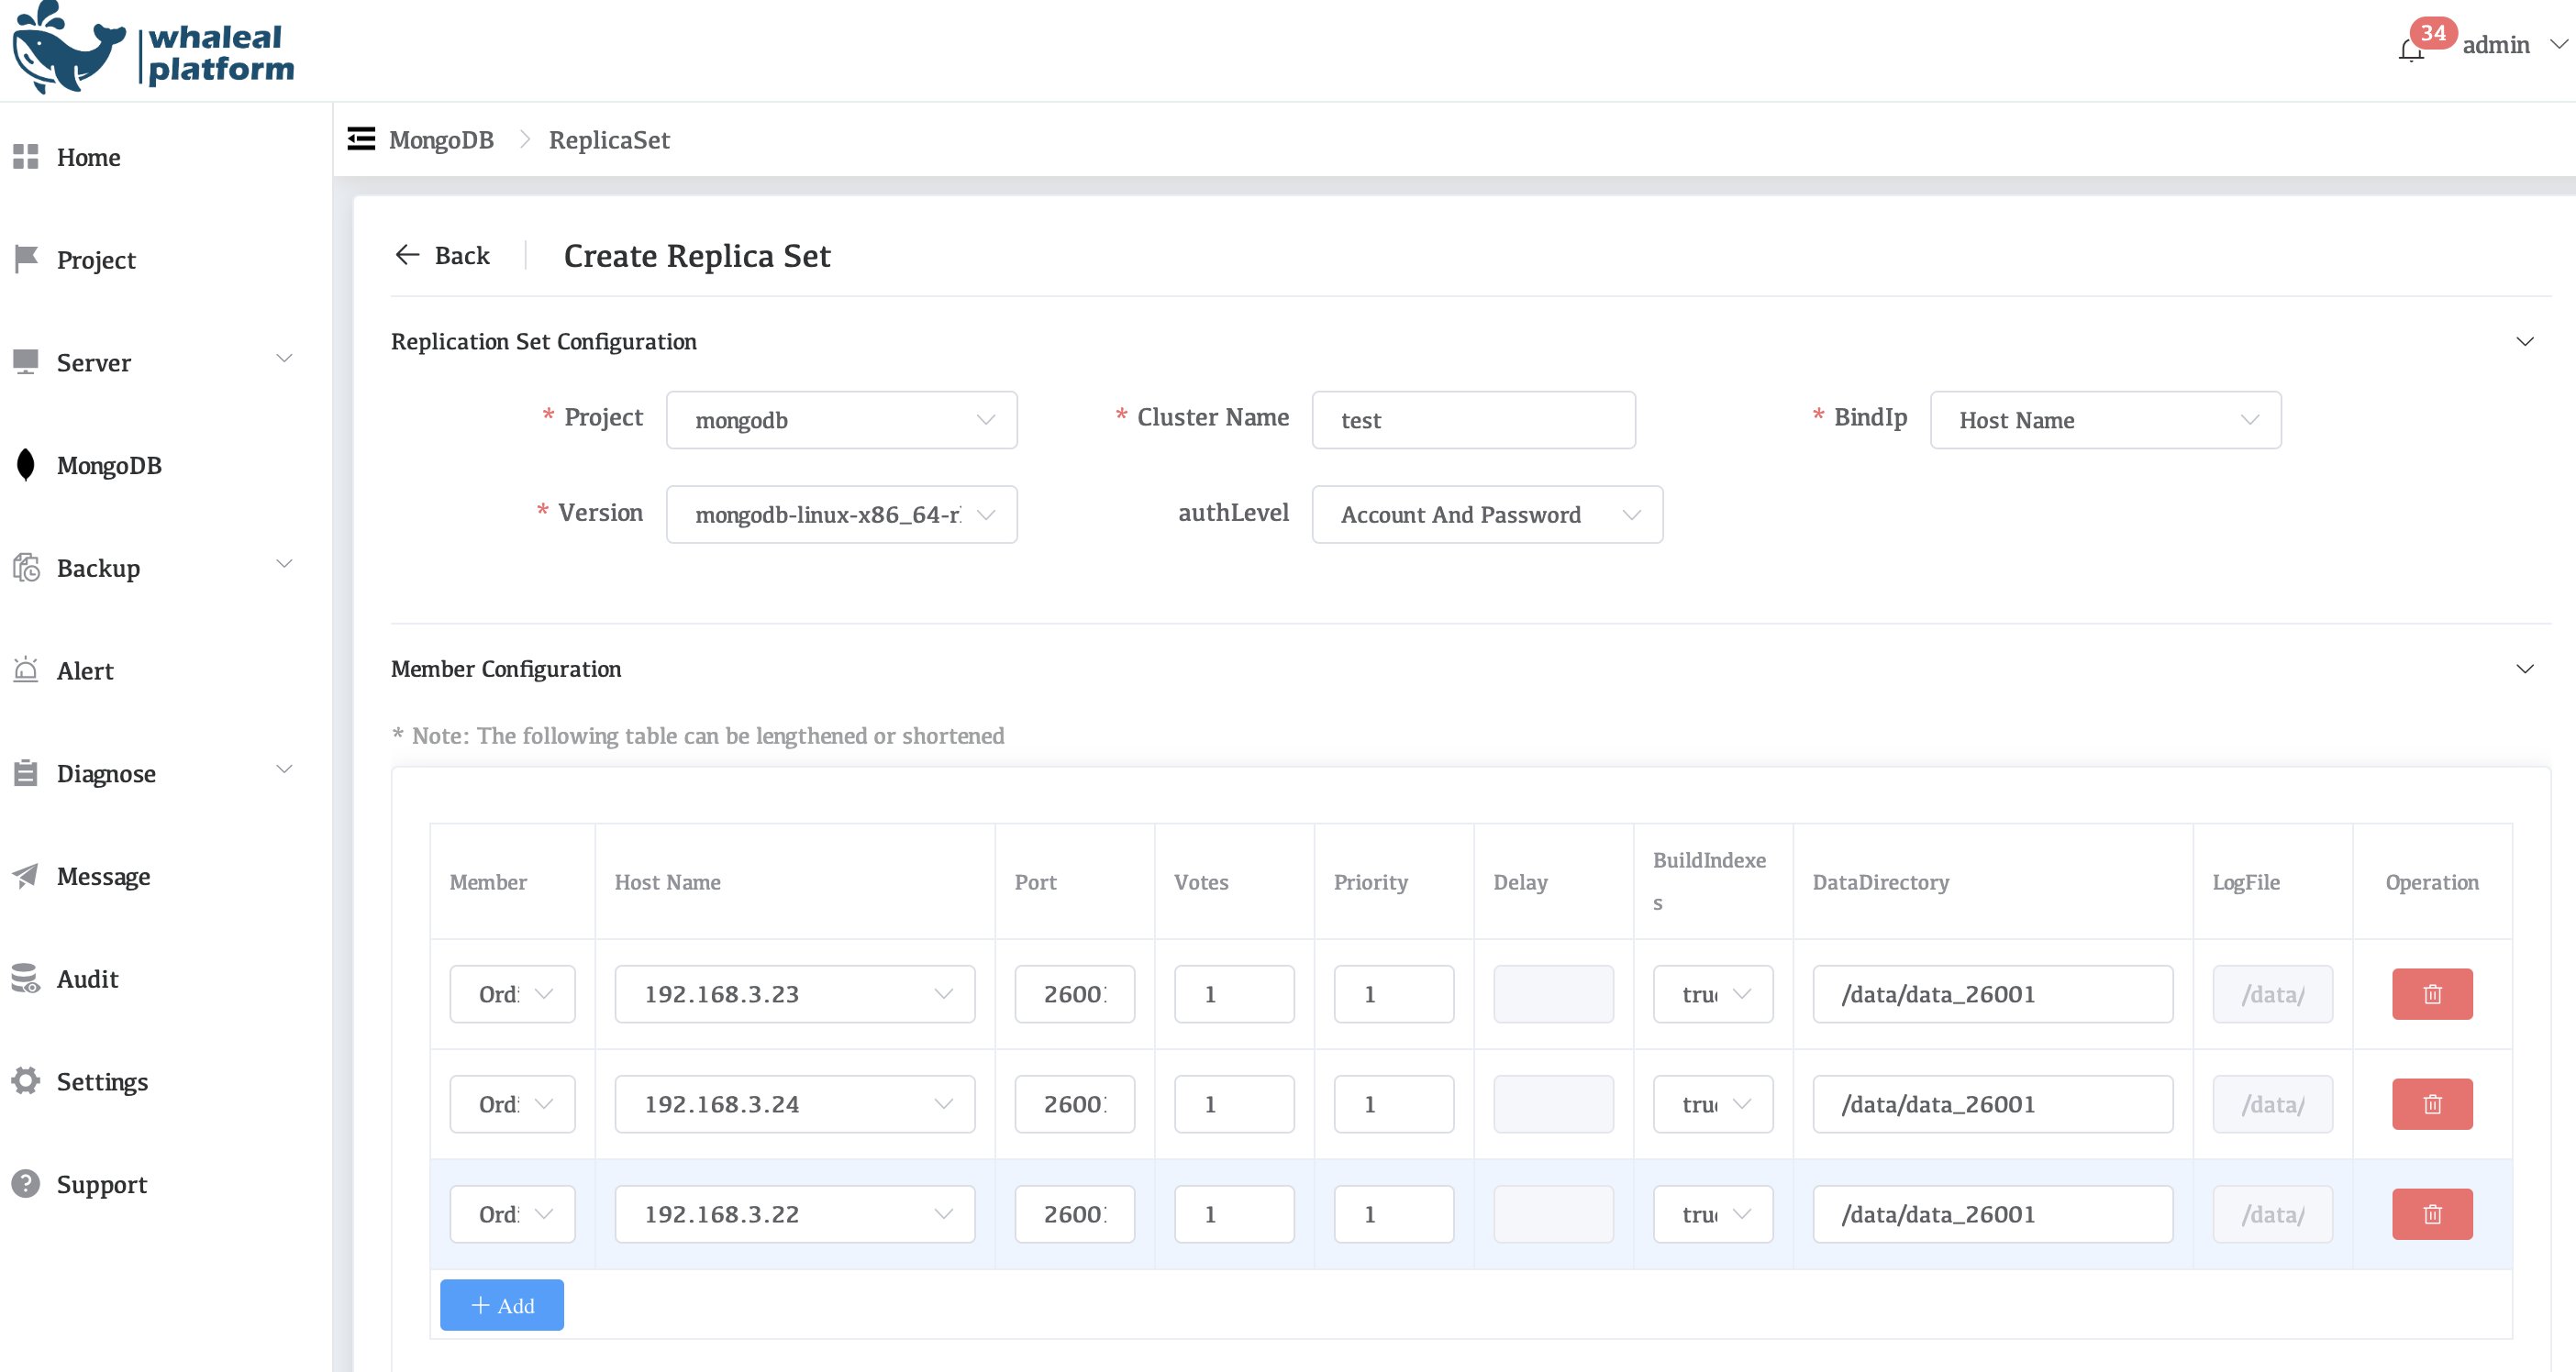
Create replication set node status information.
-
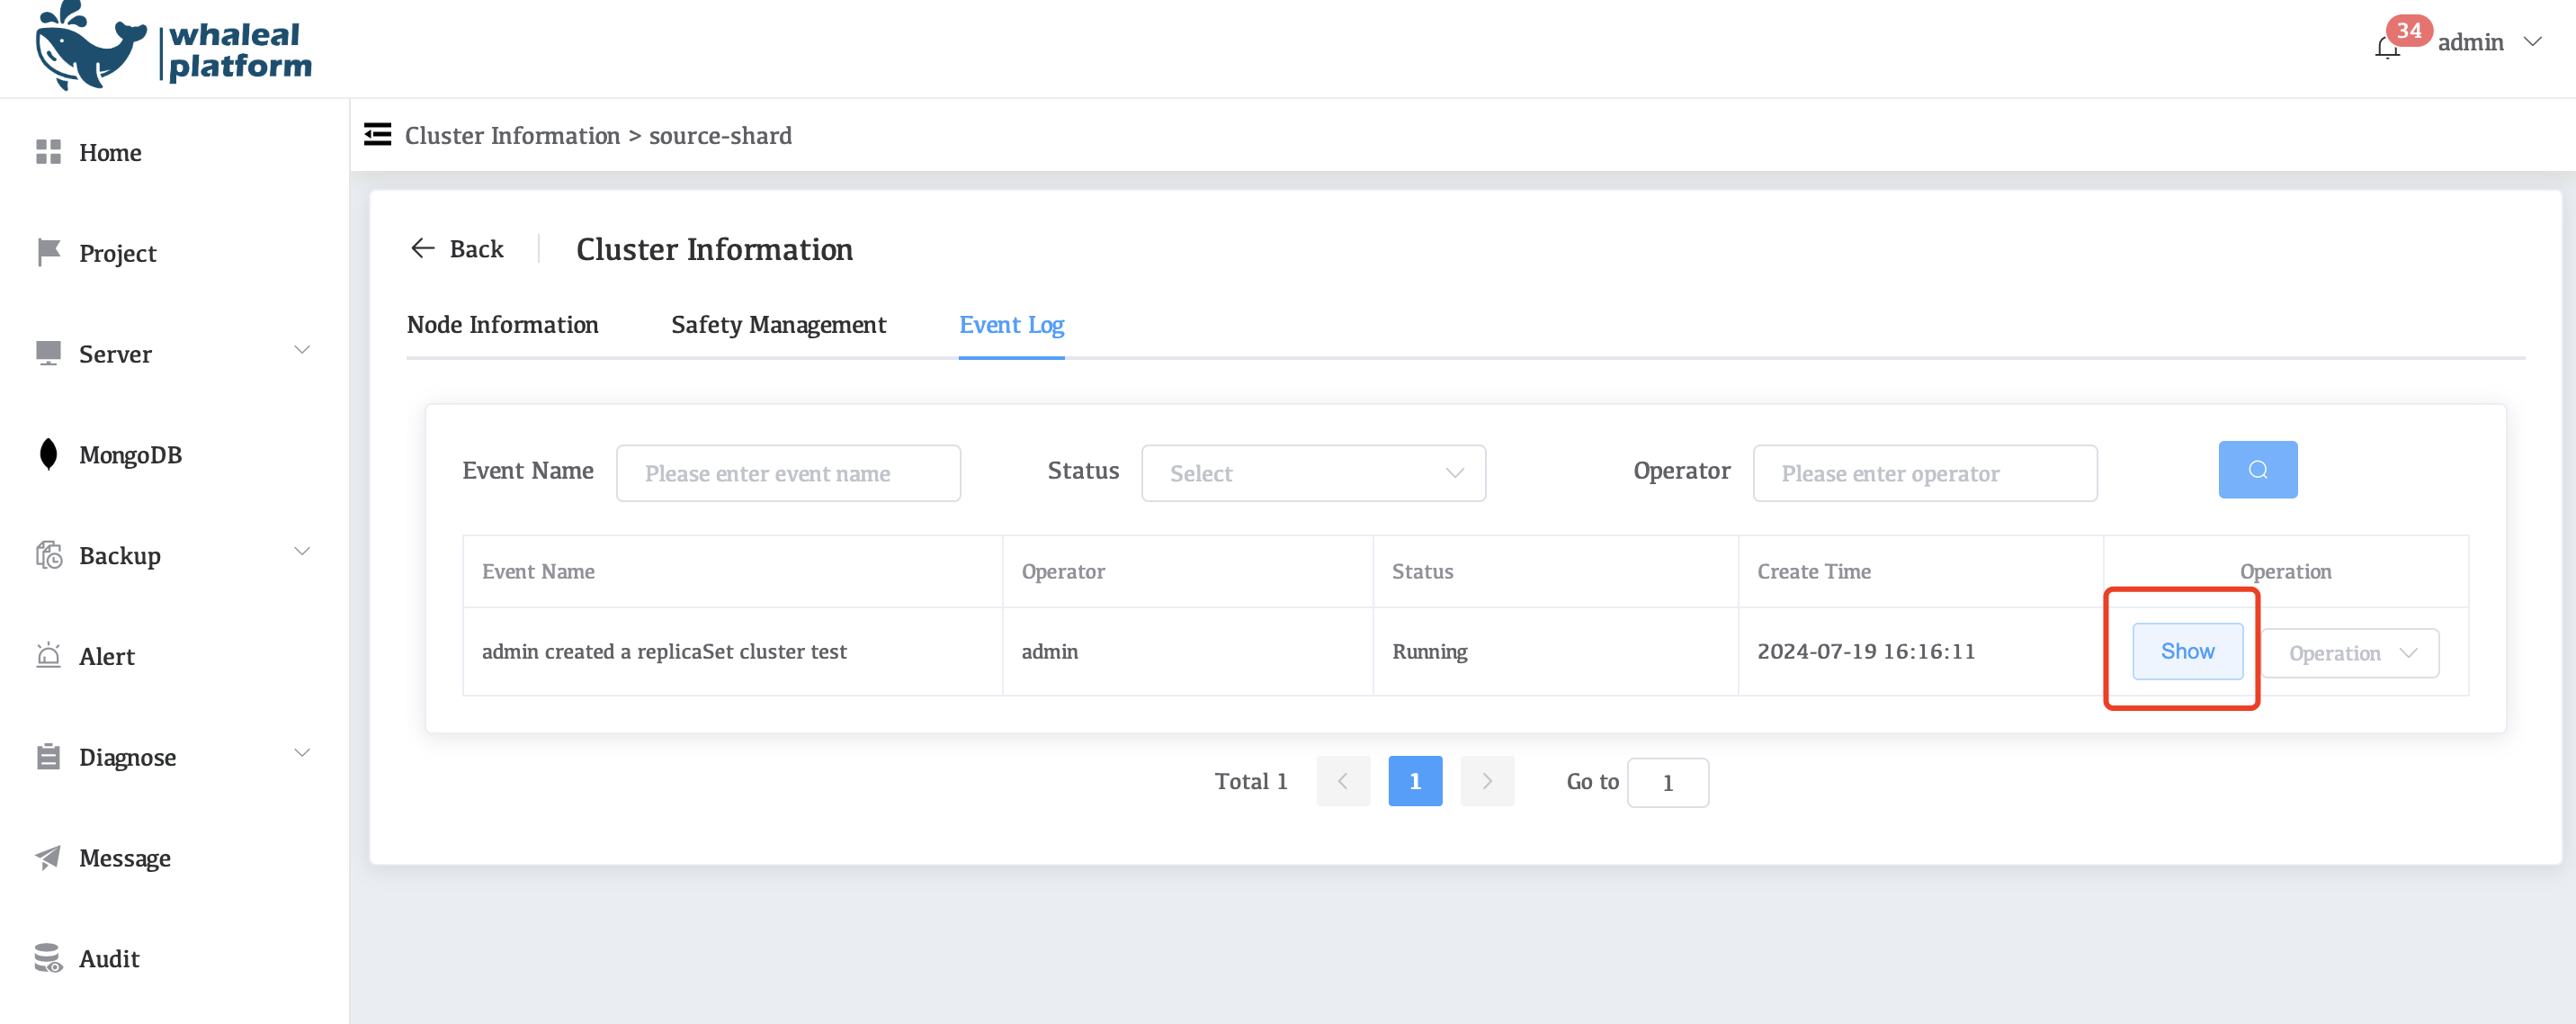
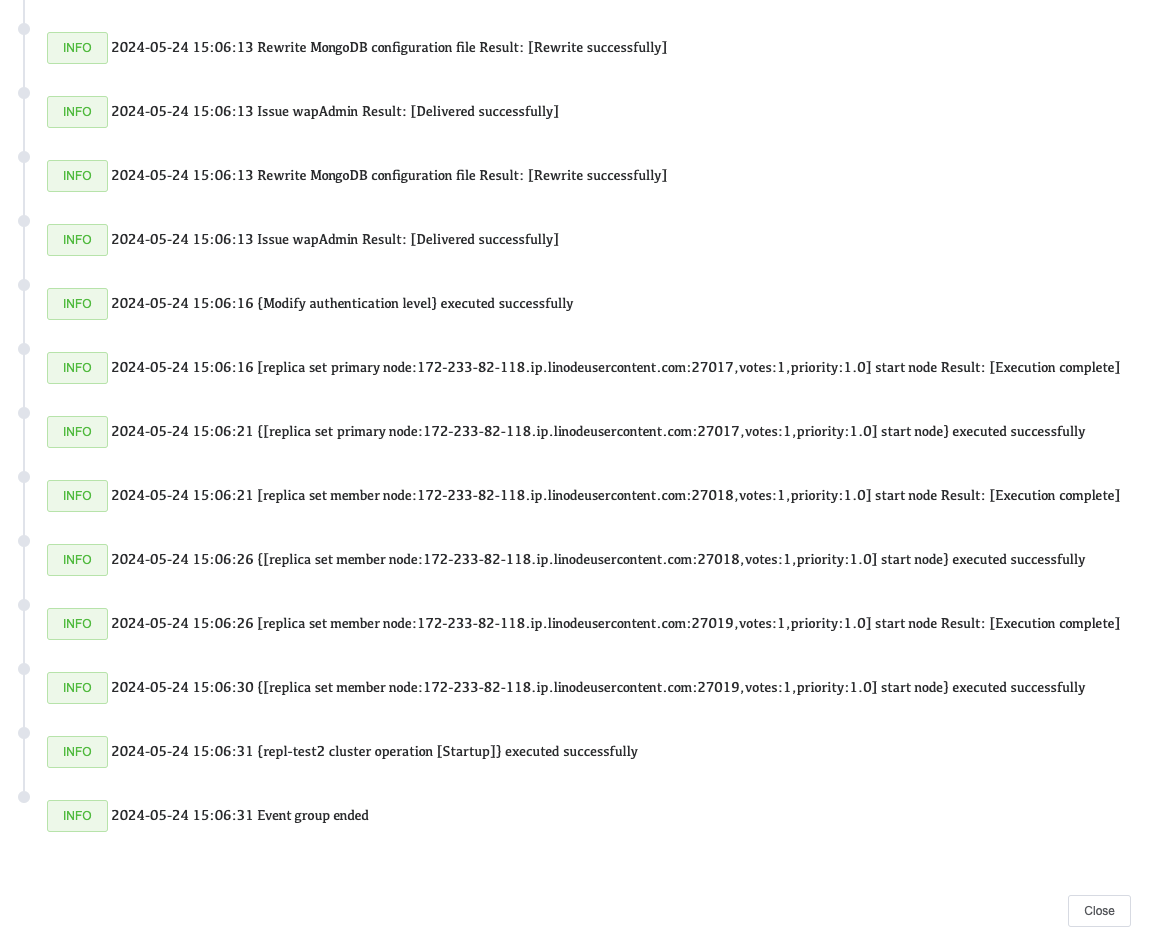
Click on the Show to view the real-time creation log.
-
Check the log to determine whether the cluster was created successfully.

-
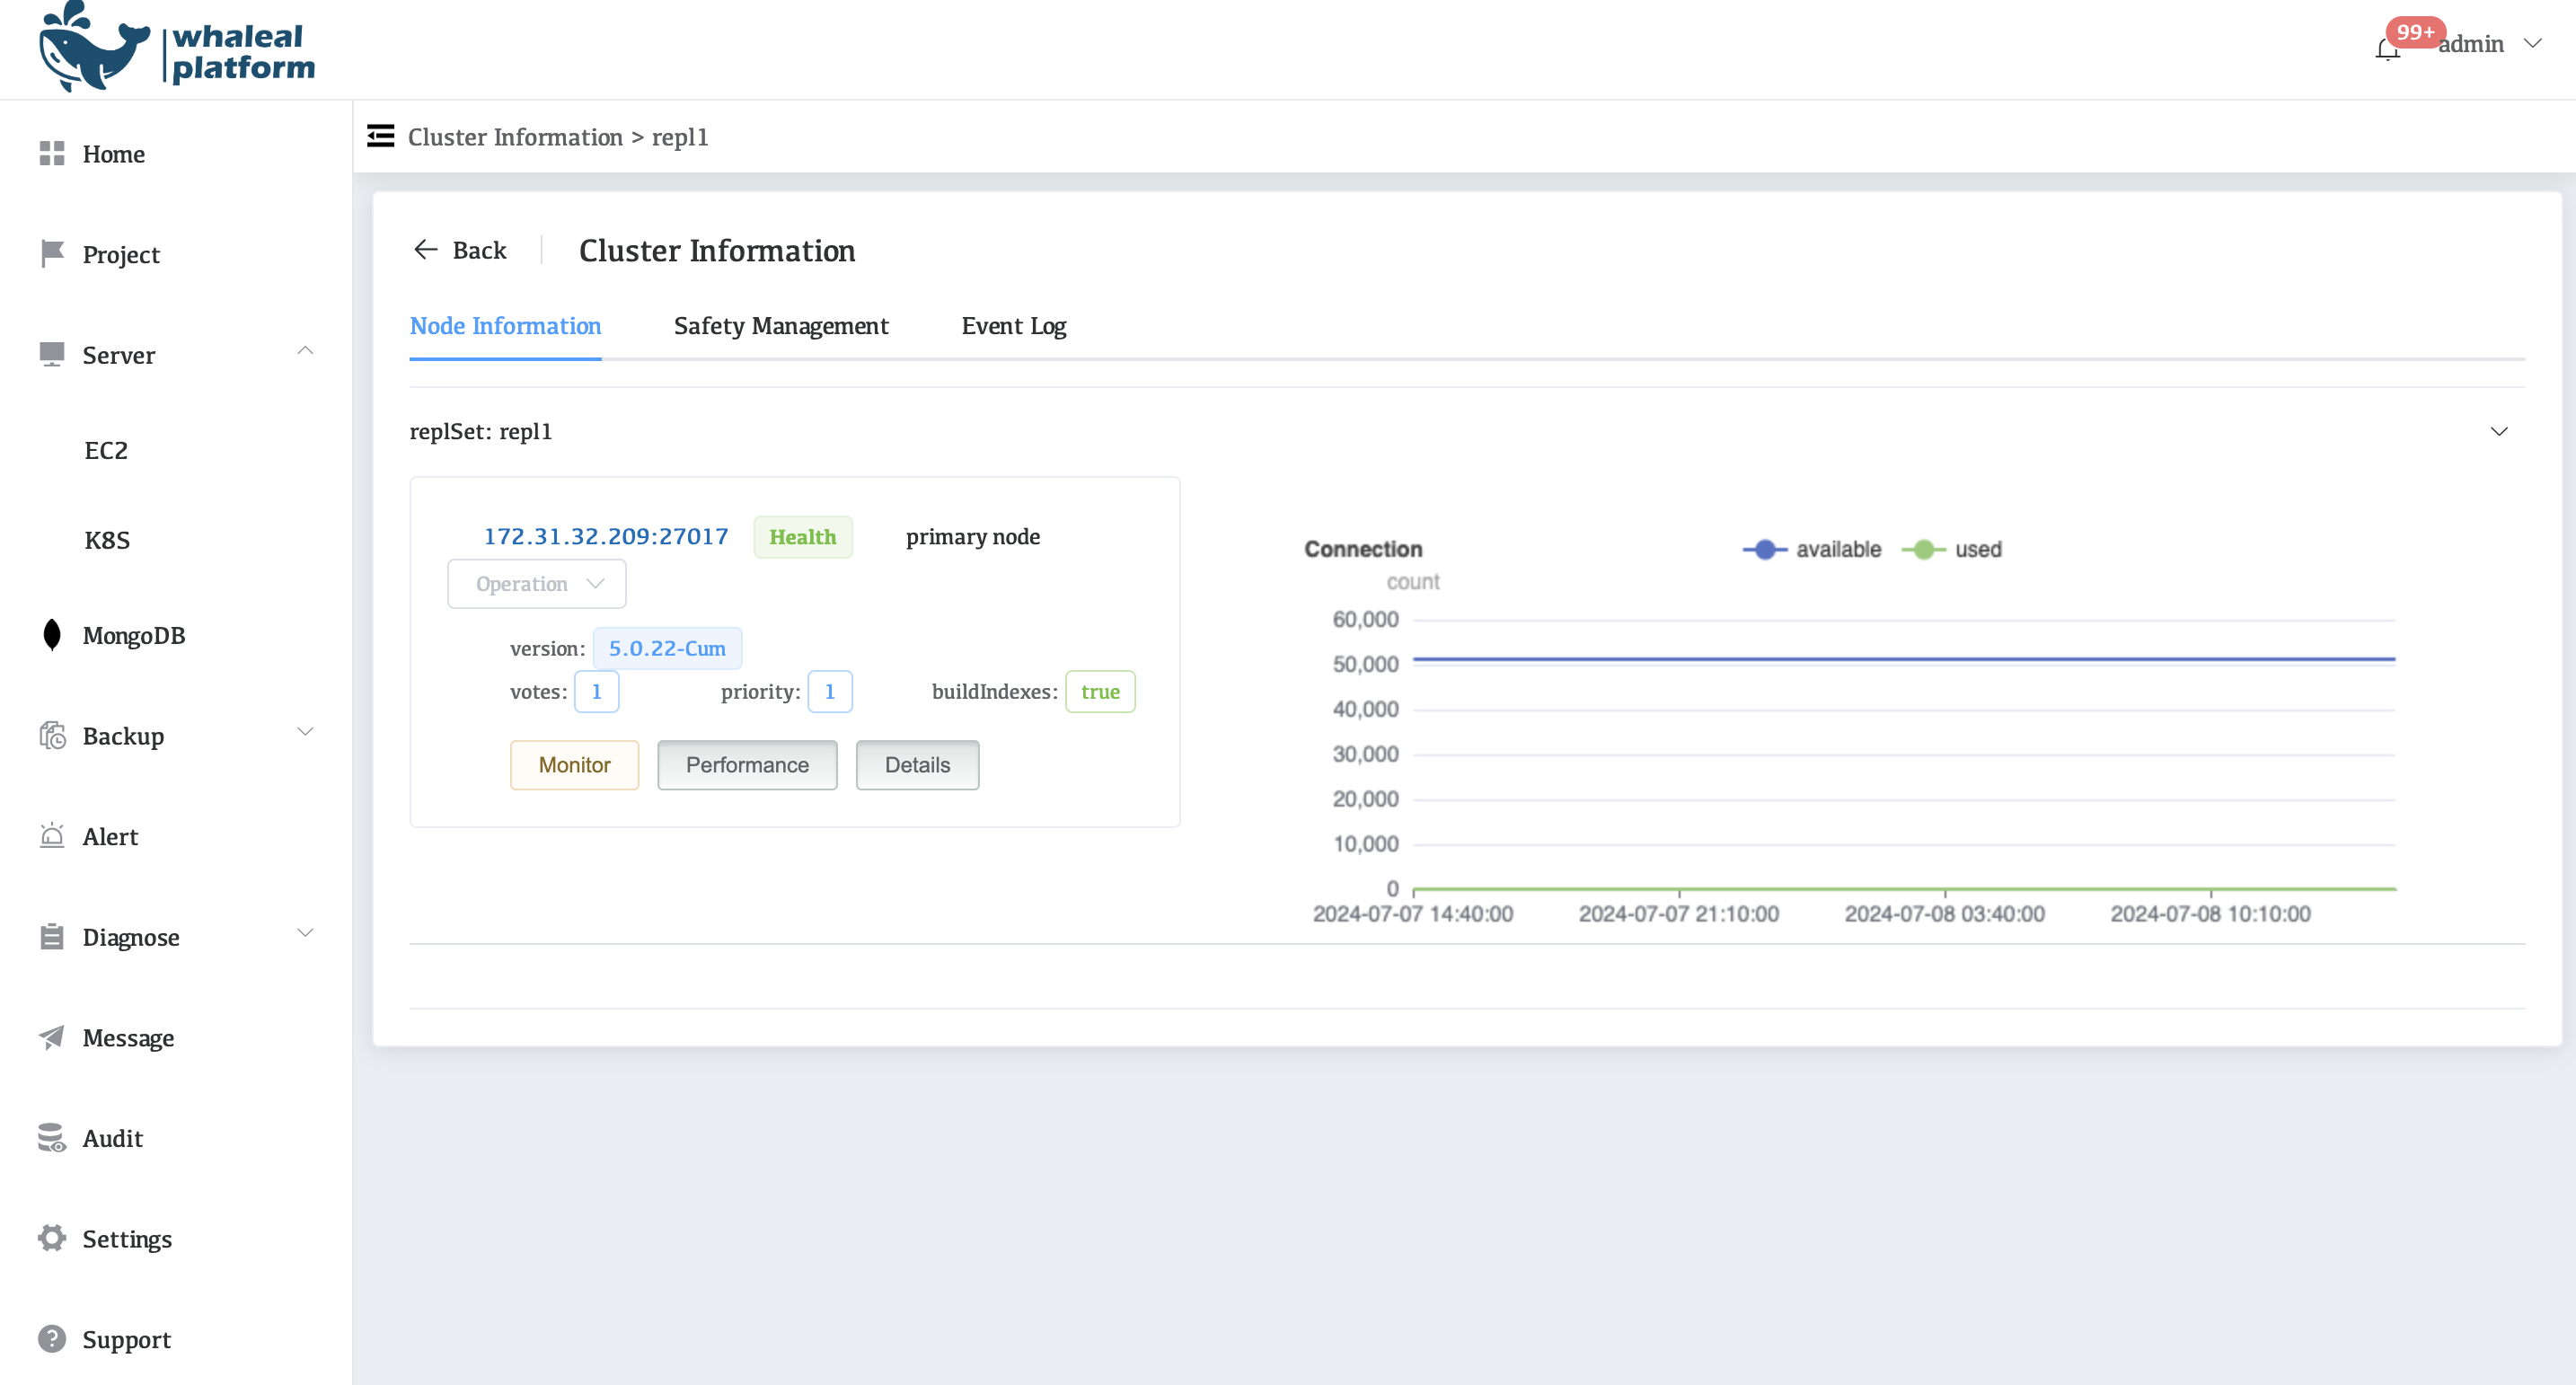
View information on each node in MongoDB
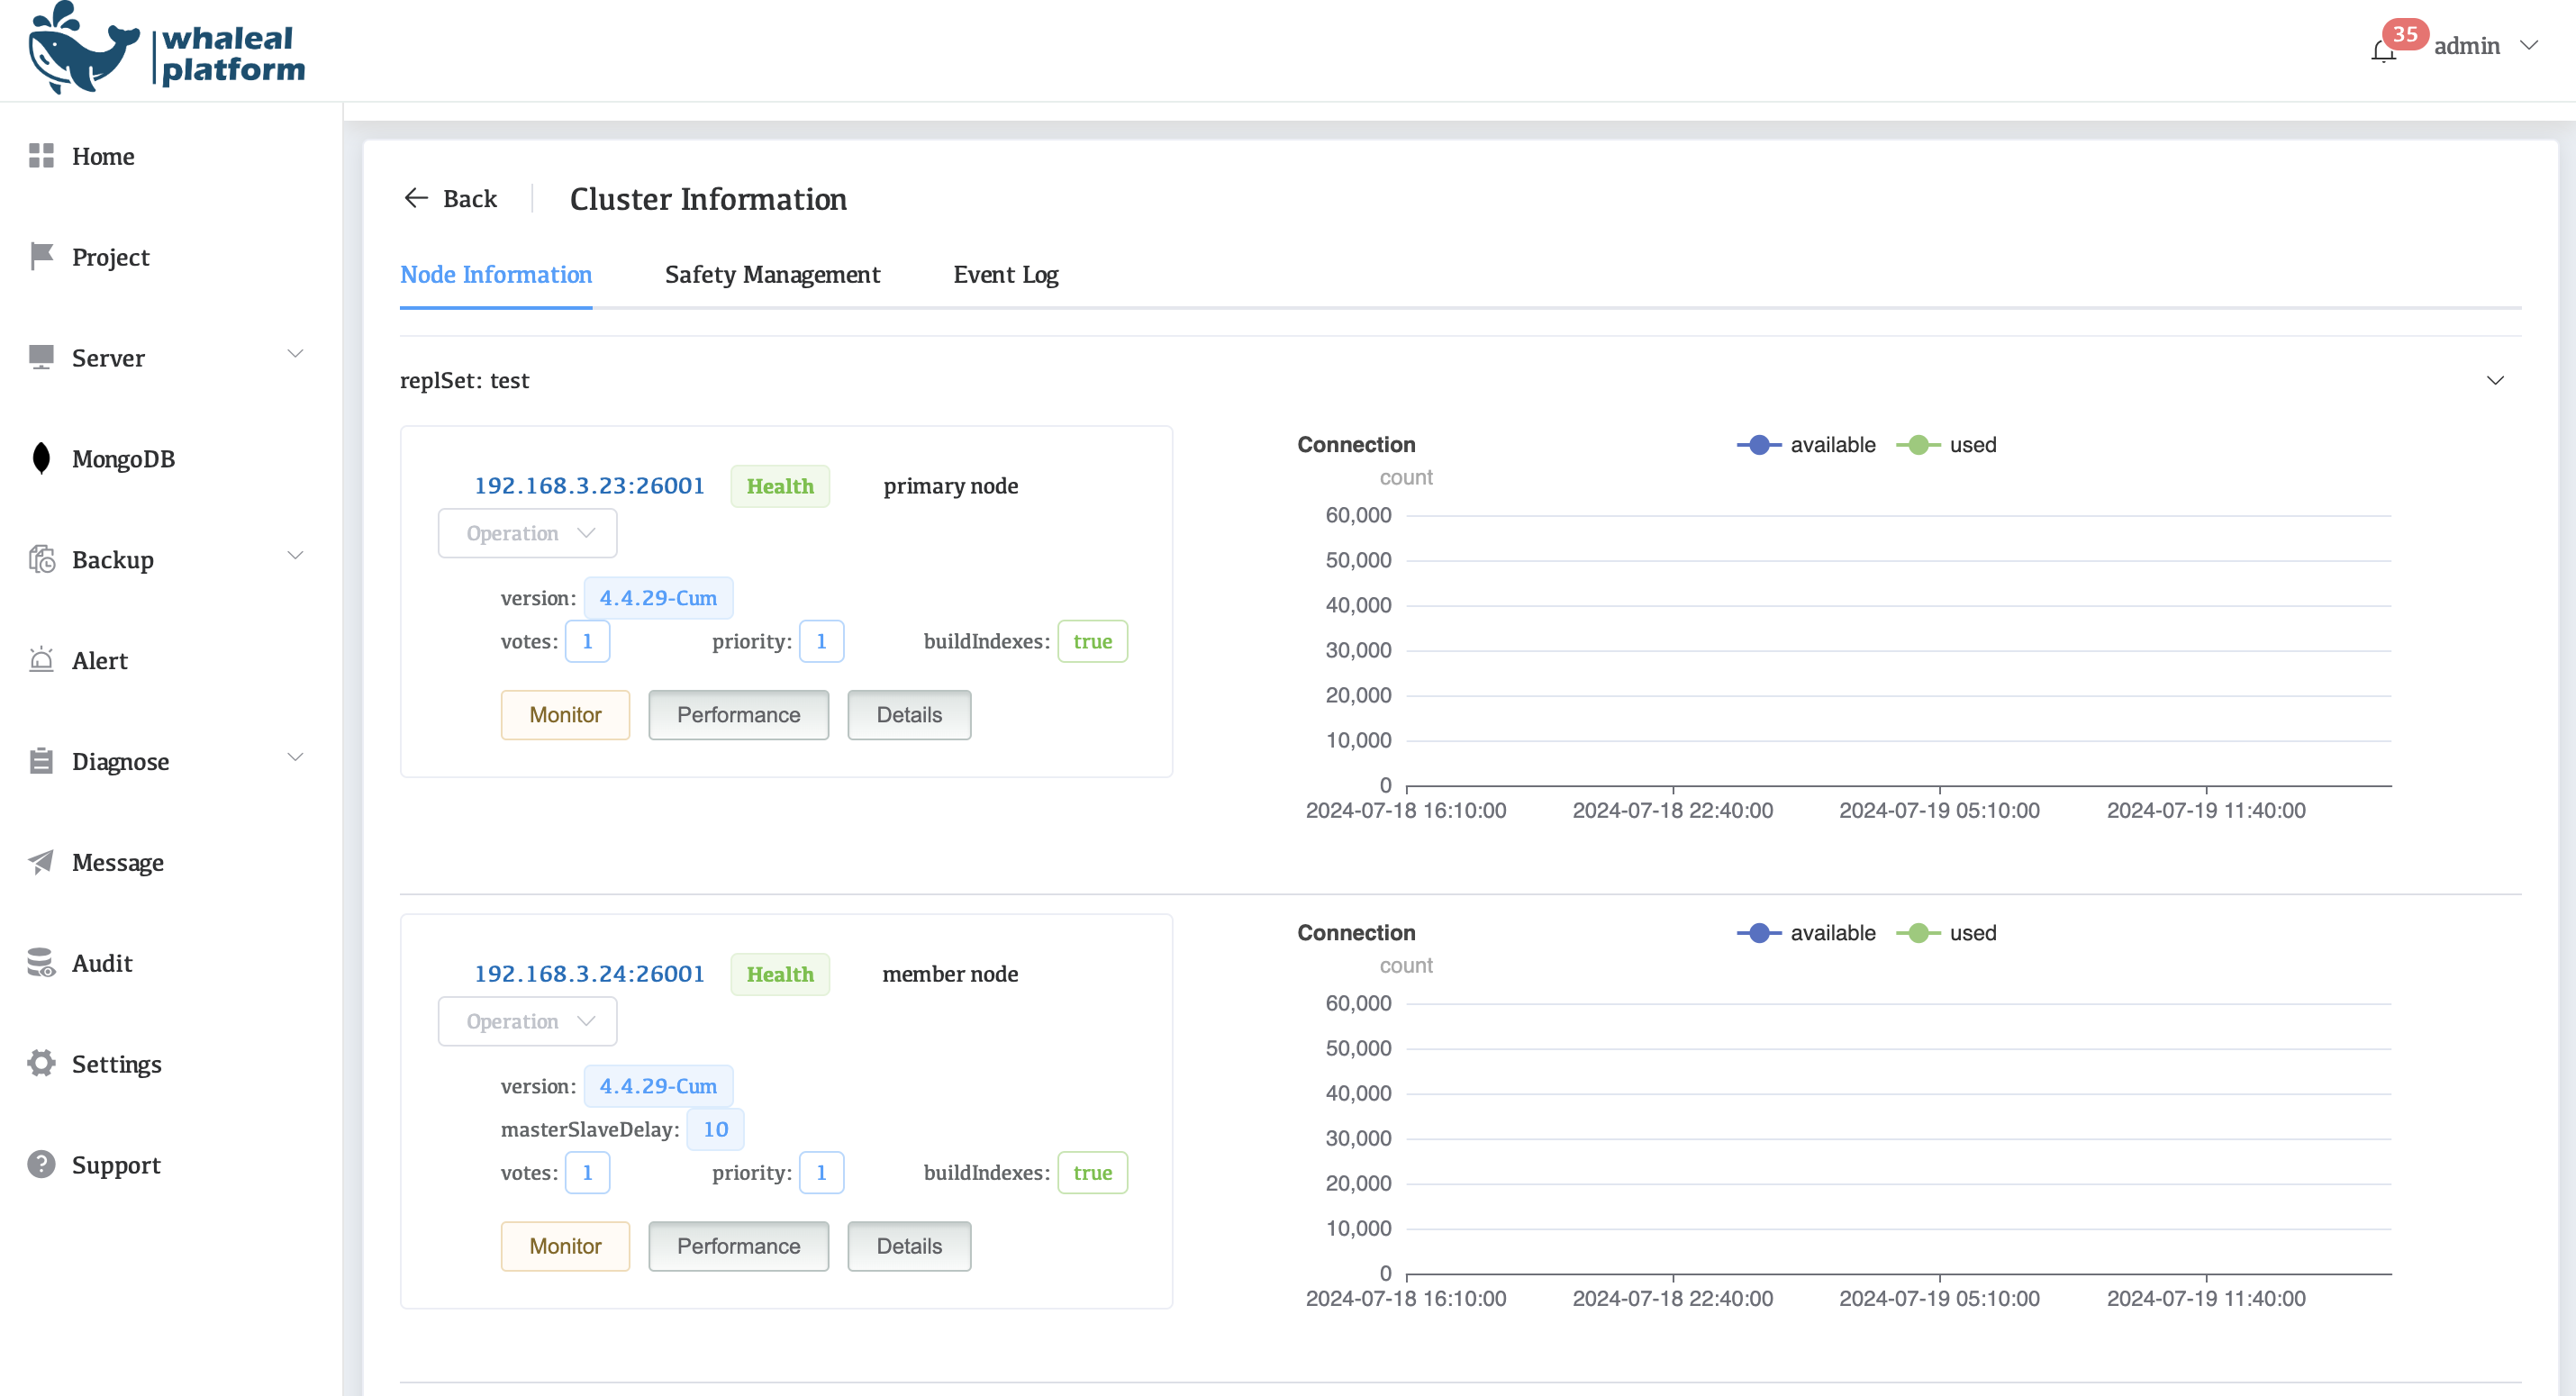
-
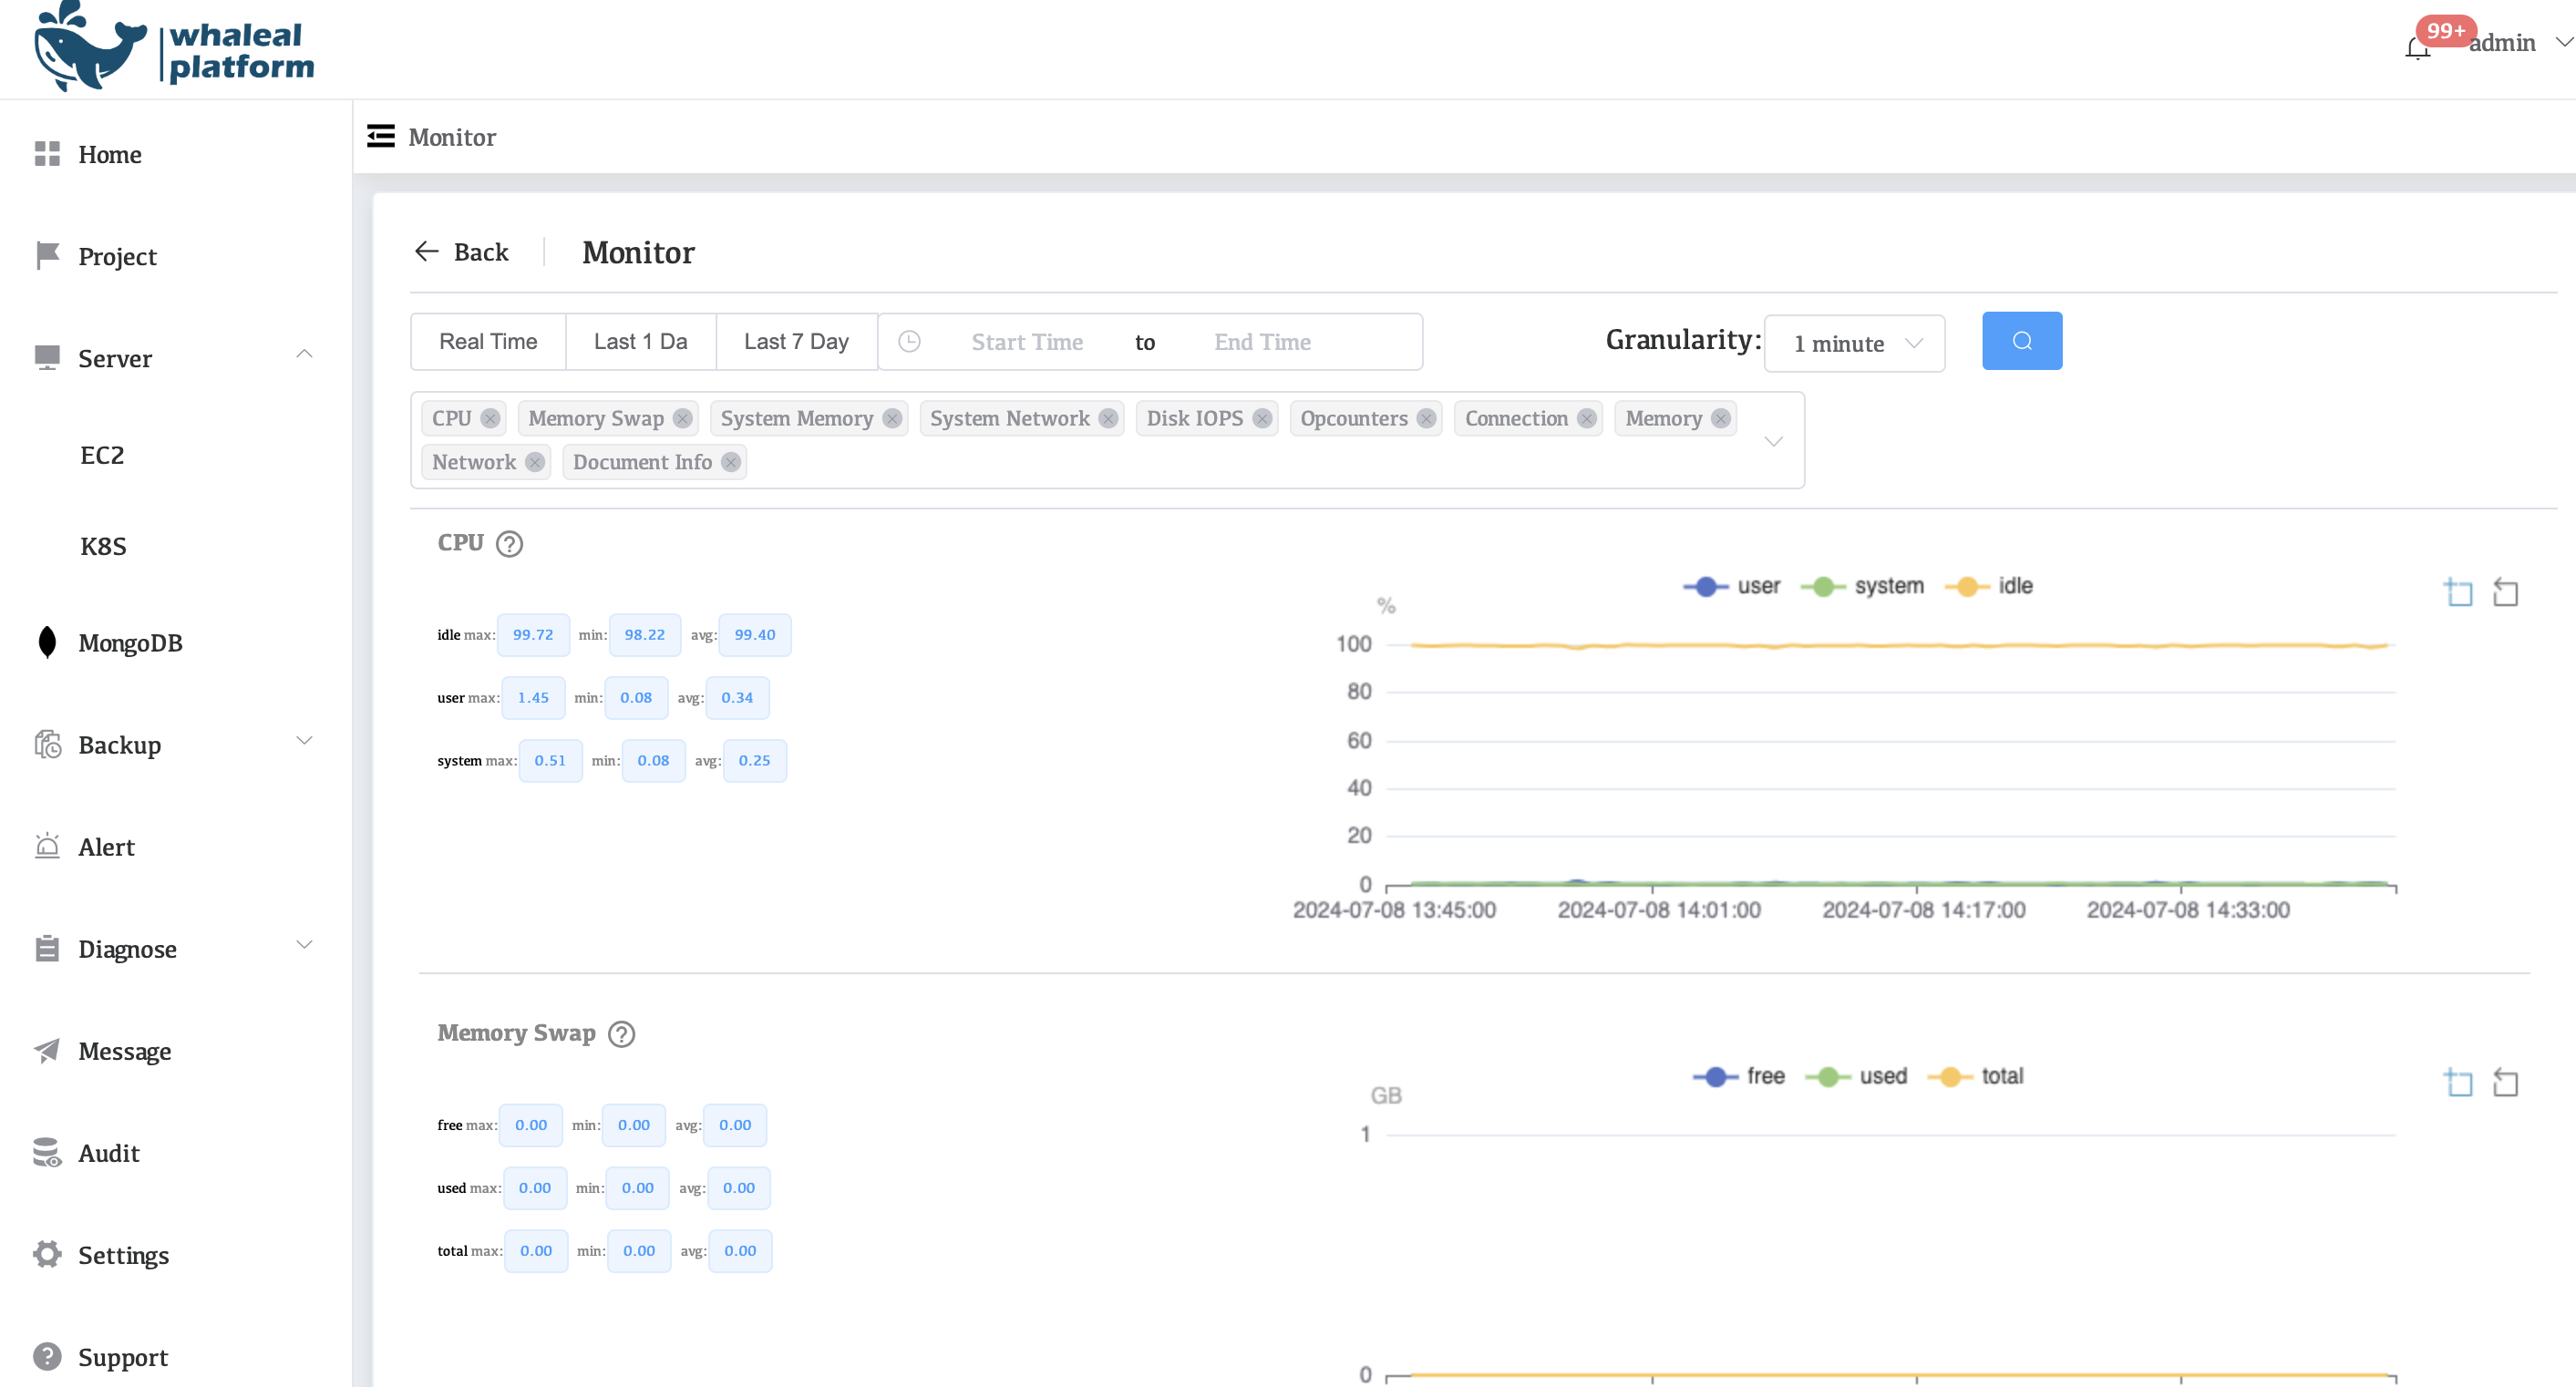
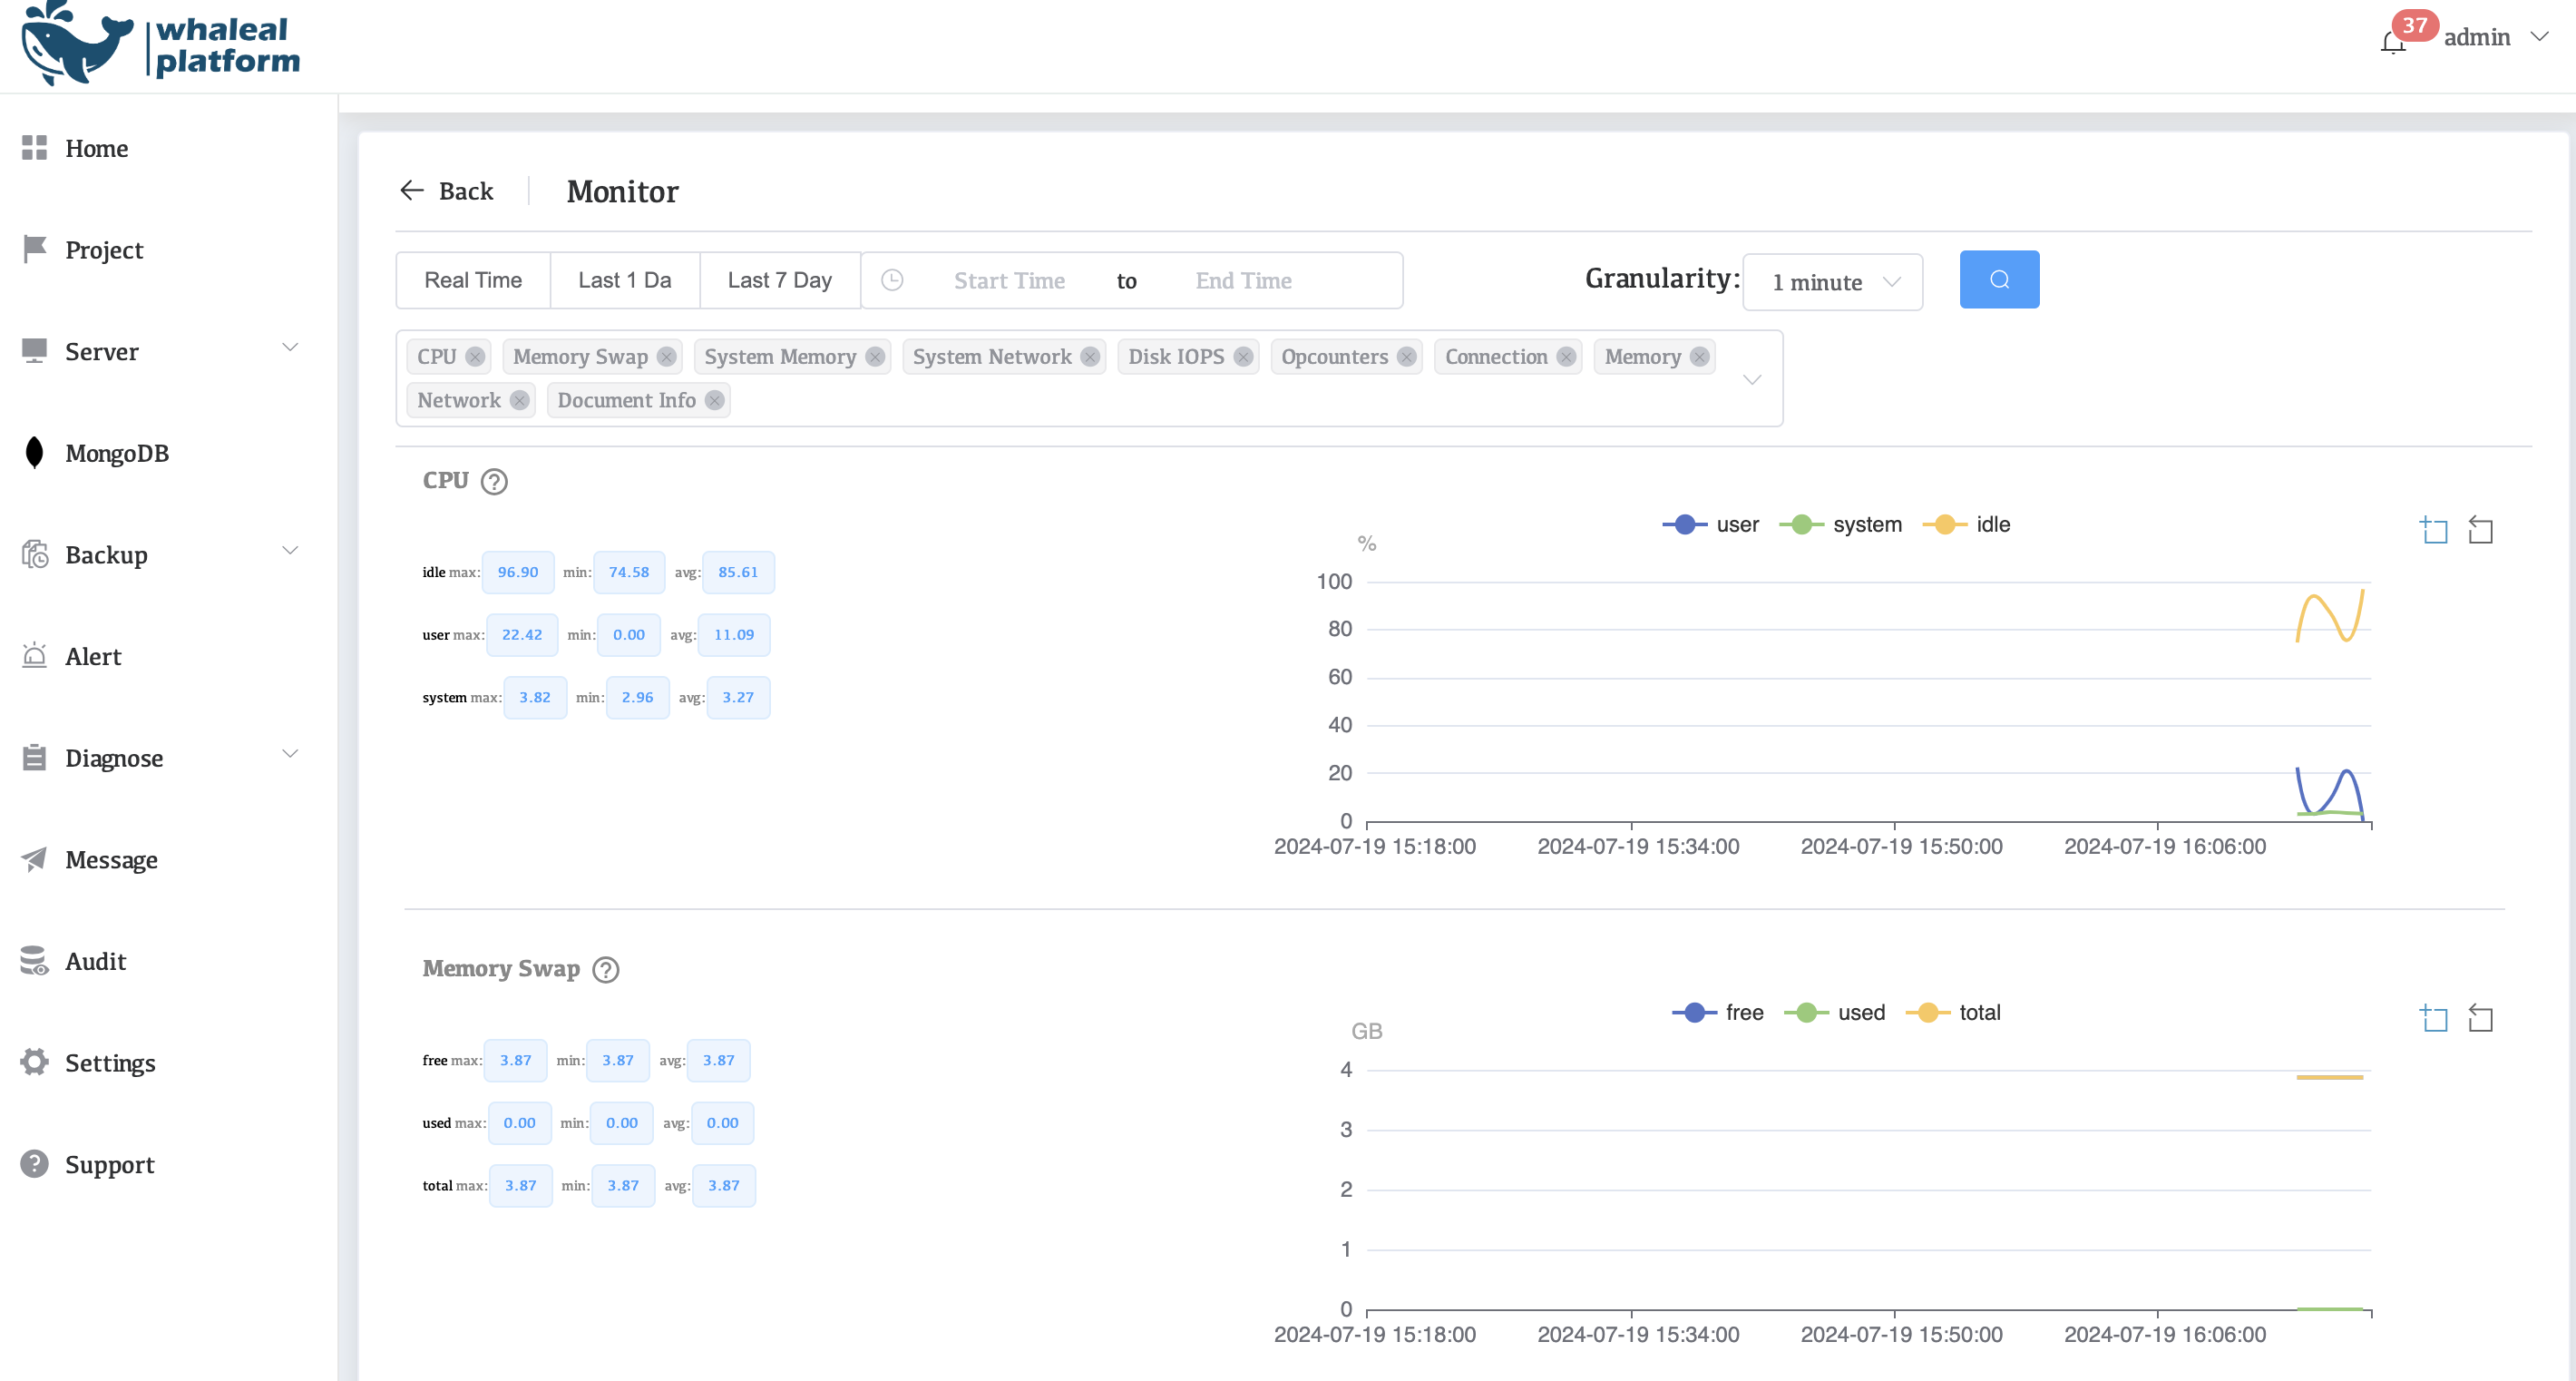
Check the surveillance
Existing MongoDB Deployment
Reference: Deploy MongoDB's server
-
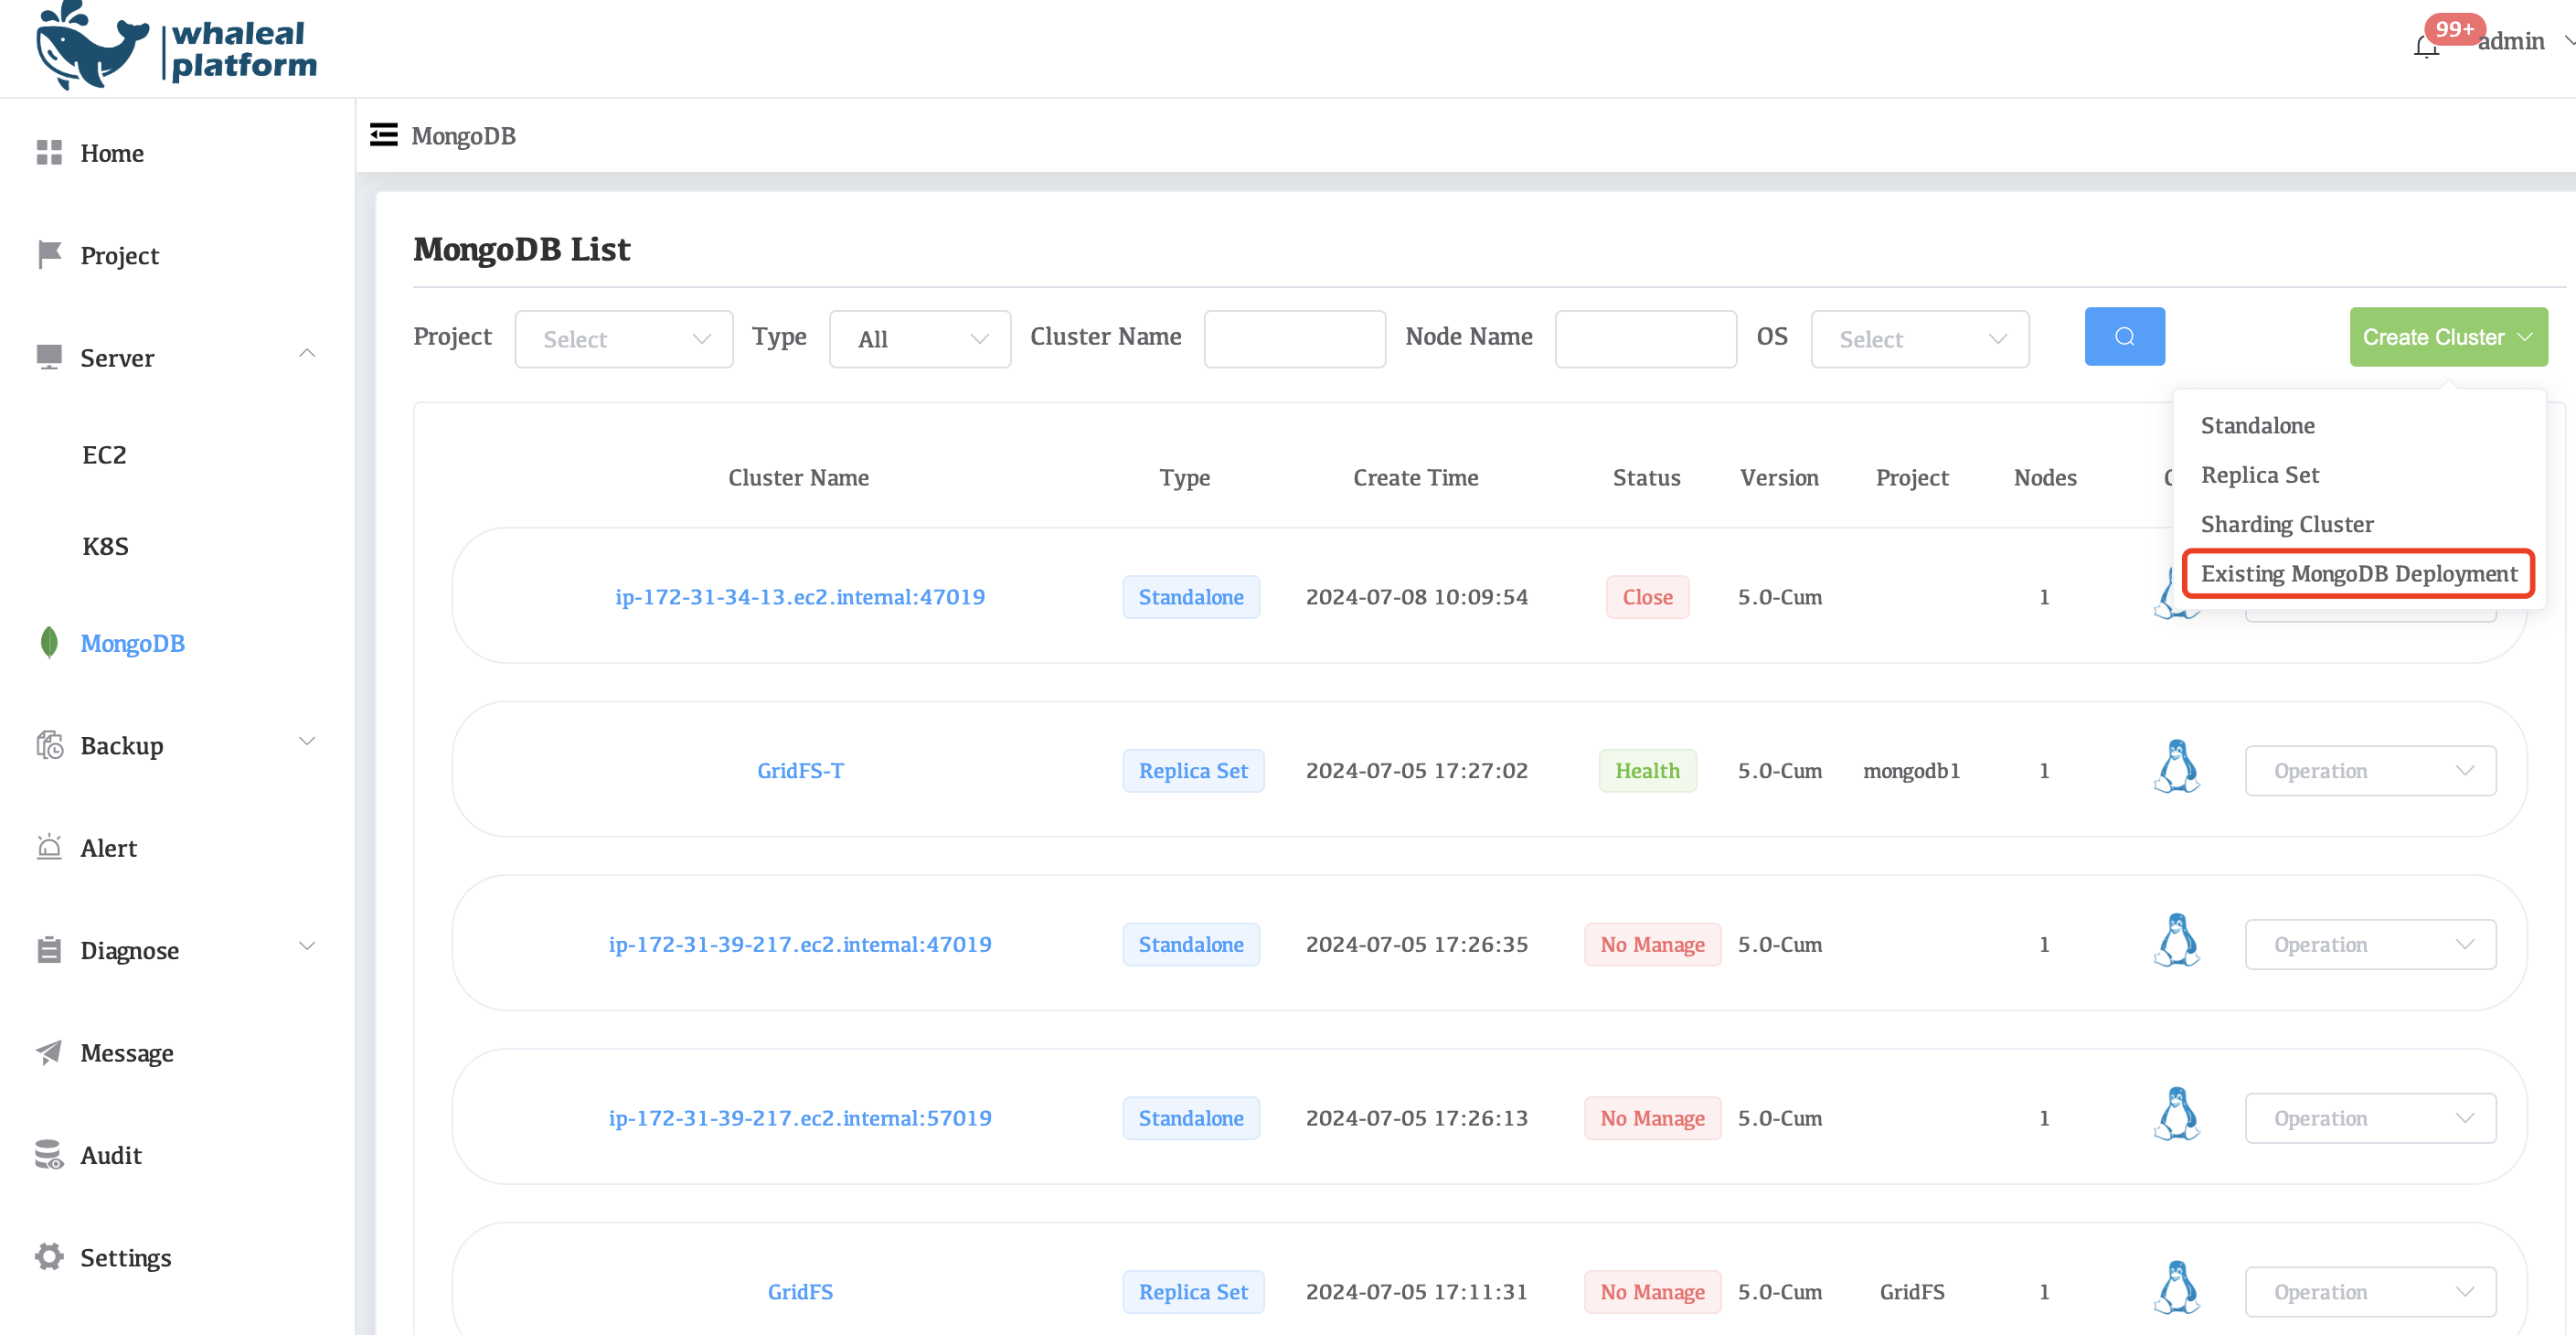
Click to the MongoDB page and open "Existing MongoDB Deployment".
-
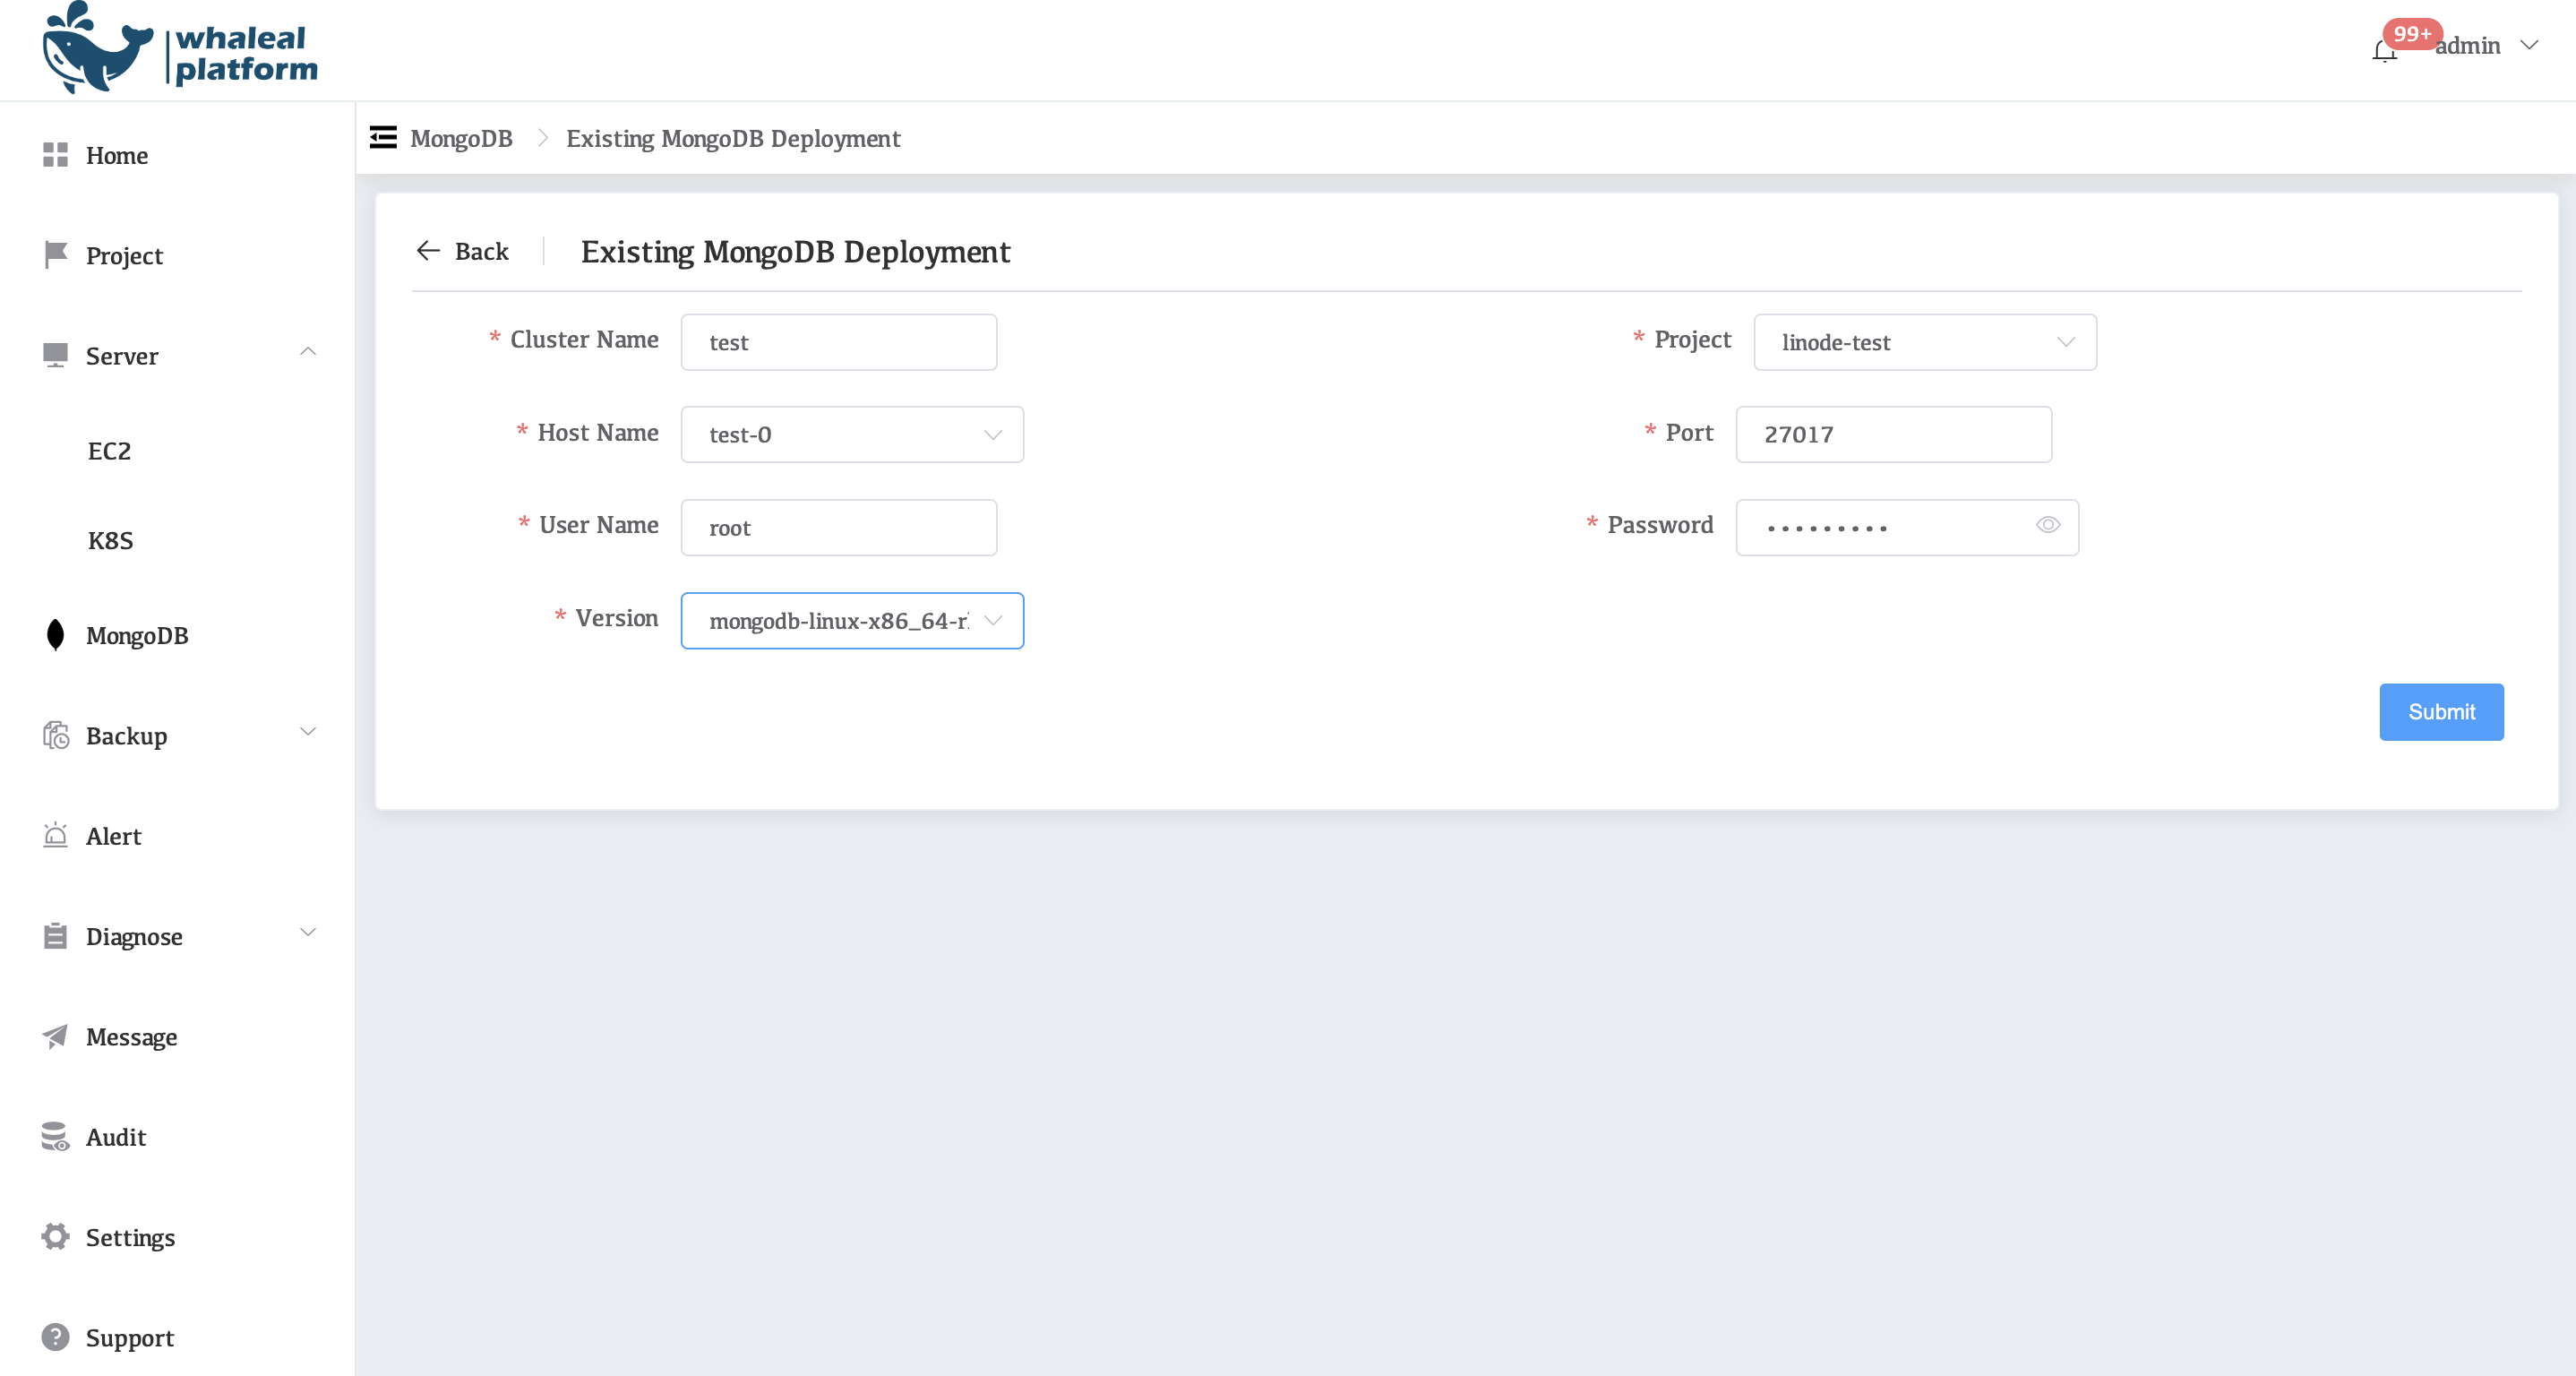
Fill in and copy relevant information
- Enter the cluster name of the replication set (custom)
- Select the project and host name of the storage management system
- Enter the port number of the MongoDB cluster
- Add MongoDB's authenticated username and password
- Select the version number corresponding to the cluster
-
Check the event log to determine whether the management was successful.
-
View cluster node information.
-
view the monitoring data.